Add a remote MCP provider
Model Context Protocol (MCP) is an open standard that lets AI applications connect to external tools and data sources. Connect Mark (Optimizely Agent Platform) to a remote MCP server to extend it with tools and data from an external system. Mark administrators add and manage remote MCP servers on the External Providers tab.
After an administrator registers a remote MCP provider and adds the tools, a tile becomes available on the Connectors tab. Mark users and agent builders use the tile to authenticate with the MCP provider. They can then call Mark tools that use the remote MCP server.
Prerequisites
To add a remote MCP provider to Mark, you must have the following:
- The Mark administrator role.
- The MCP server URL.
- Either a bearer token or the OAuth credentials the MCP server requires.
Register a remote MCP provider
Registering the provider is the first step in connecting Mark to an MCP server. To register a remote MCP provider, complete the following steps:
- Go to Connectors > External Providers.
- Click Add Remote MCP Provider.
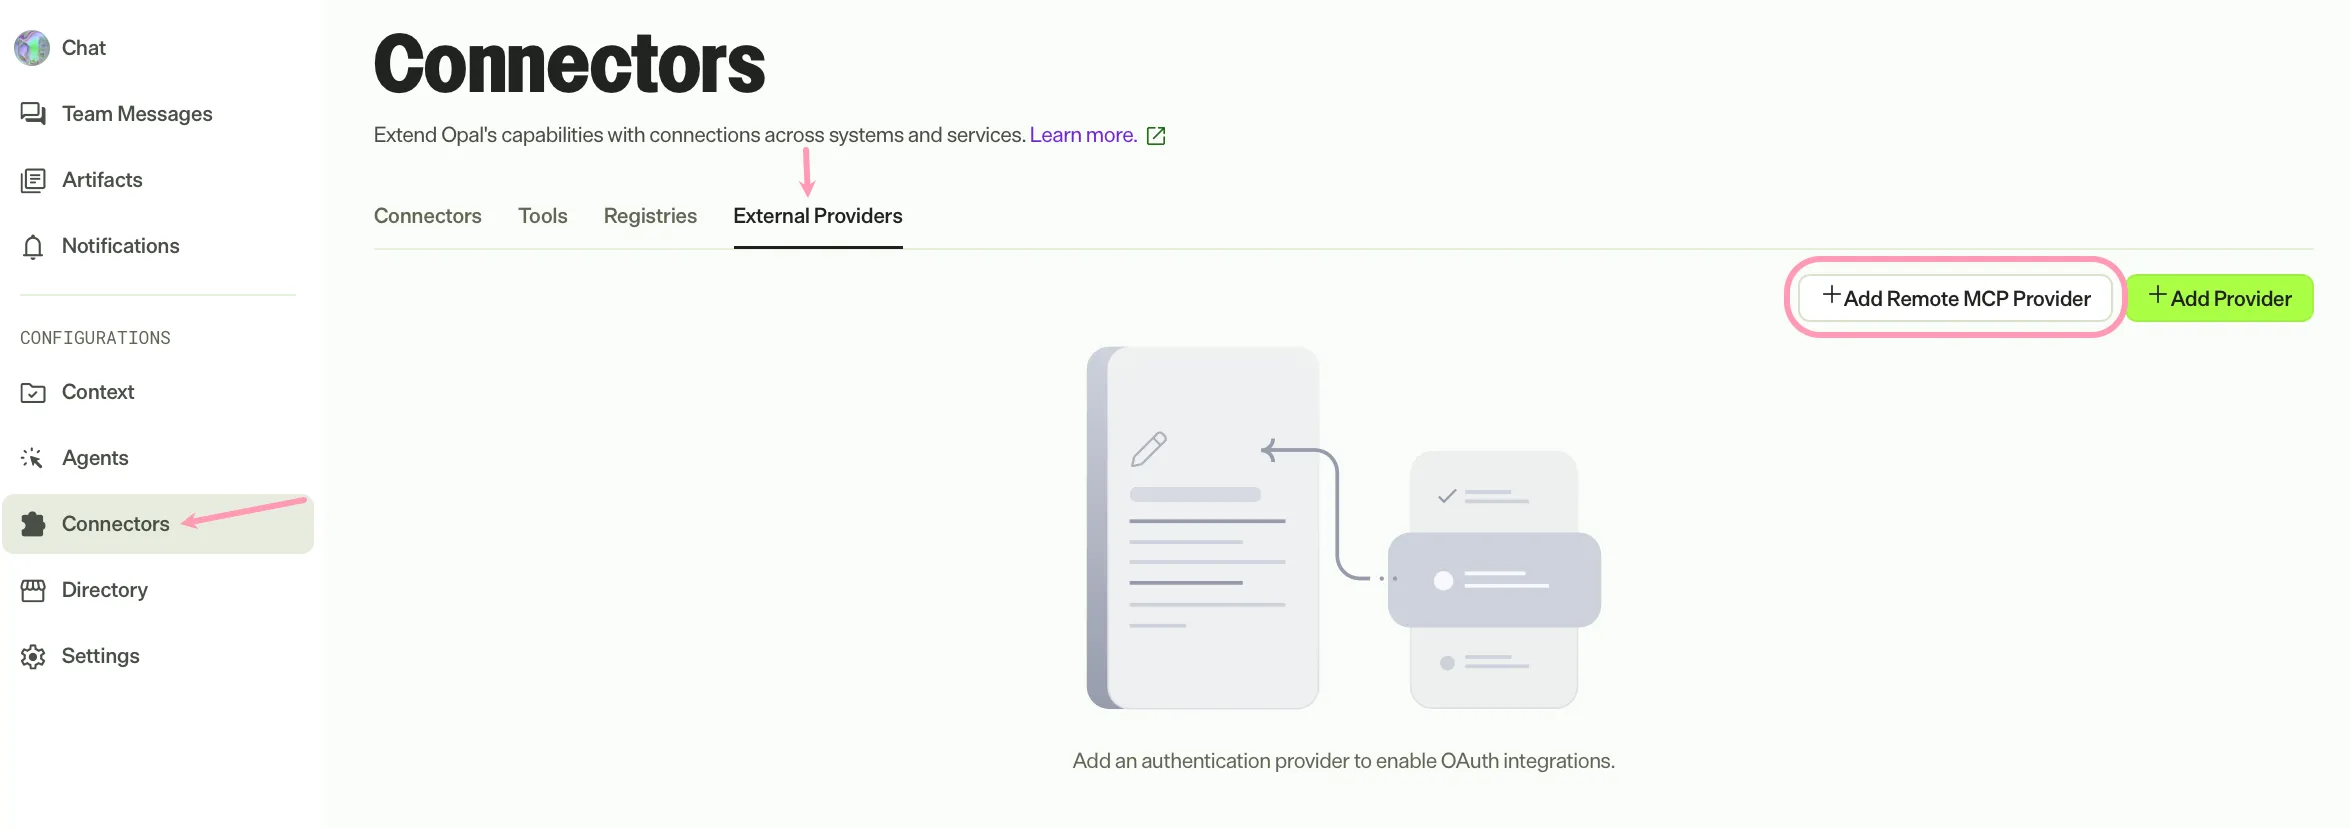
- Enter the MCP Server URL.
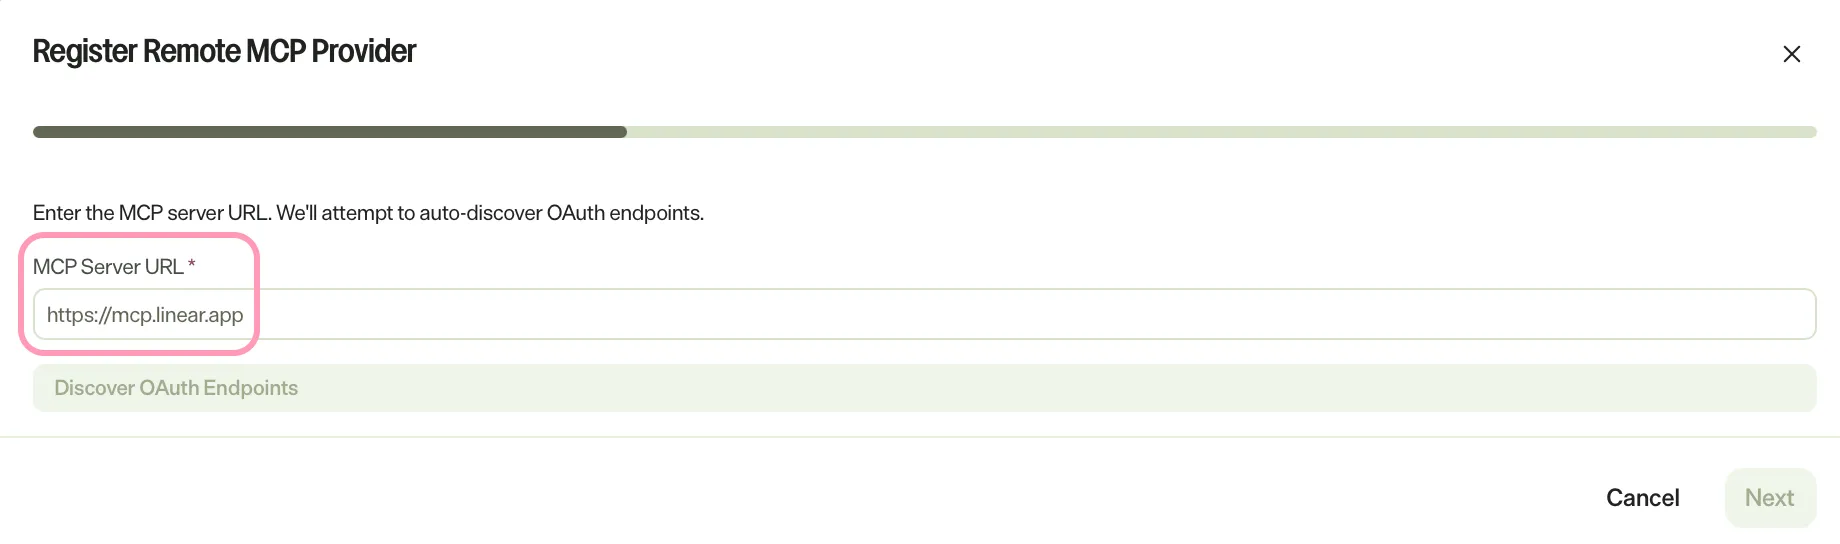
- Select Bearer Token or Discover OAuth Endpoints as your authentication method.
- Go to the corresponding section to complete authentication.
Authenticate with a bearer token
If you select bearer token, complete the following steps:
- Enter your bearer token.
- (Optional) Add a header the MCP server requires in Additional Headers. For the rules, go to Manage additional headers.
- Click Next.
Bearer token authentication does not use scopes, so there is no scope bundle to approve. Continue to the Add the tools section to grant access to specific tools from your MCP provider.
Authenticate with OAuth
If you select Discover OAuth Endpoints, complete the following steps:
- Review the Found OAuth endpoints and Scopes.
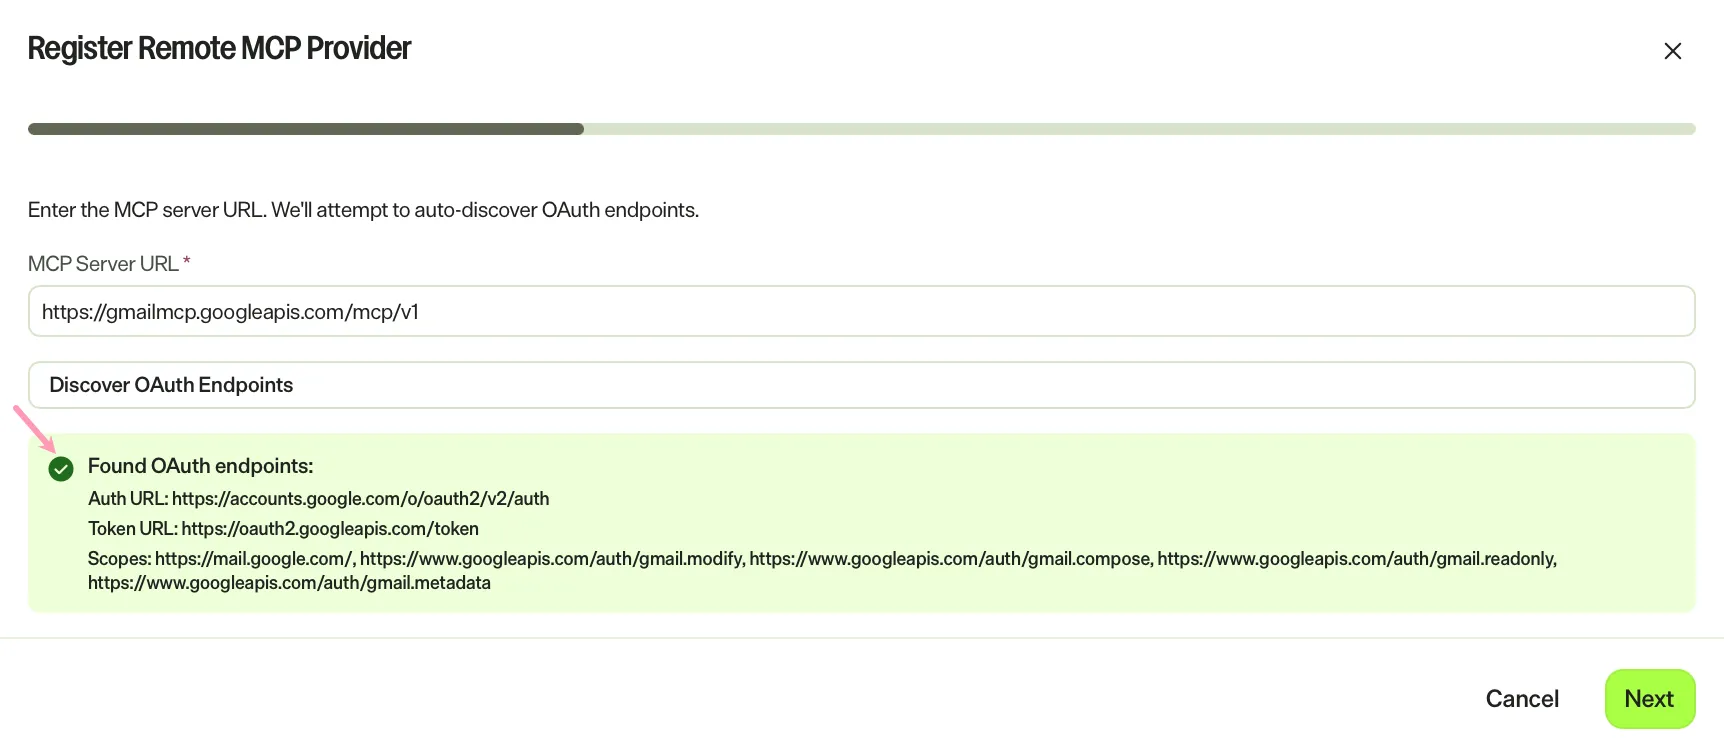
- Click Next.
- Enter a Provider Name. The provider name must be globally unique.
- (Optional) Enter a Description.
- Review the OAuth Credentials. The remote MCP server determines which fields are populated and which are required.
- Enter any required fields.
- (Optional) Add a header the MCP server requires in Additional Headers. For the rules, go to Manage additional headers.
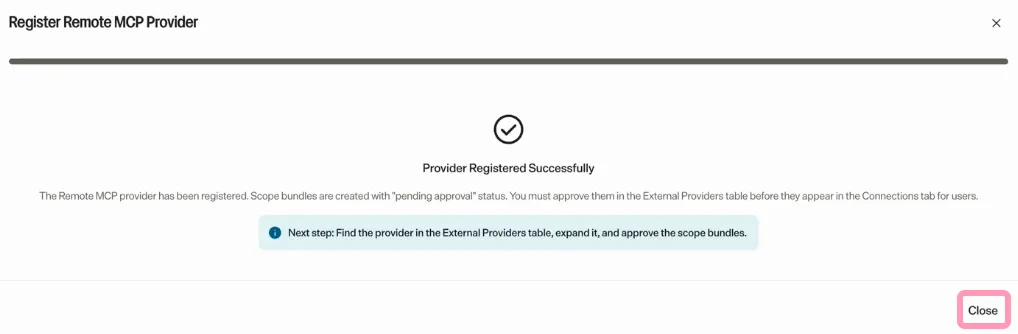
- Click Register. Mark displays a confirmation message.
- Click Close.
Approve the scope bundles
A scope bundle is a named, reviewable set of OAuth permissions. Administrators approve it once, and users consent to it when they connect a tool.
When you save the provider's tools, Mark approves a pending scope bundle automatically if at least one tool is enabled. A rejected bundle stays rejected. If the bundle stays pending, approve it with the following steps.
- Go to Connectors > External Providers.
- Expand the external provider added in the Register a remote MCP provider section.
- (Optional) Click More > Edit.
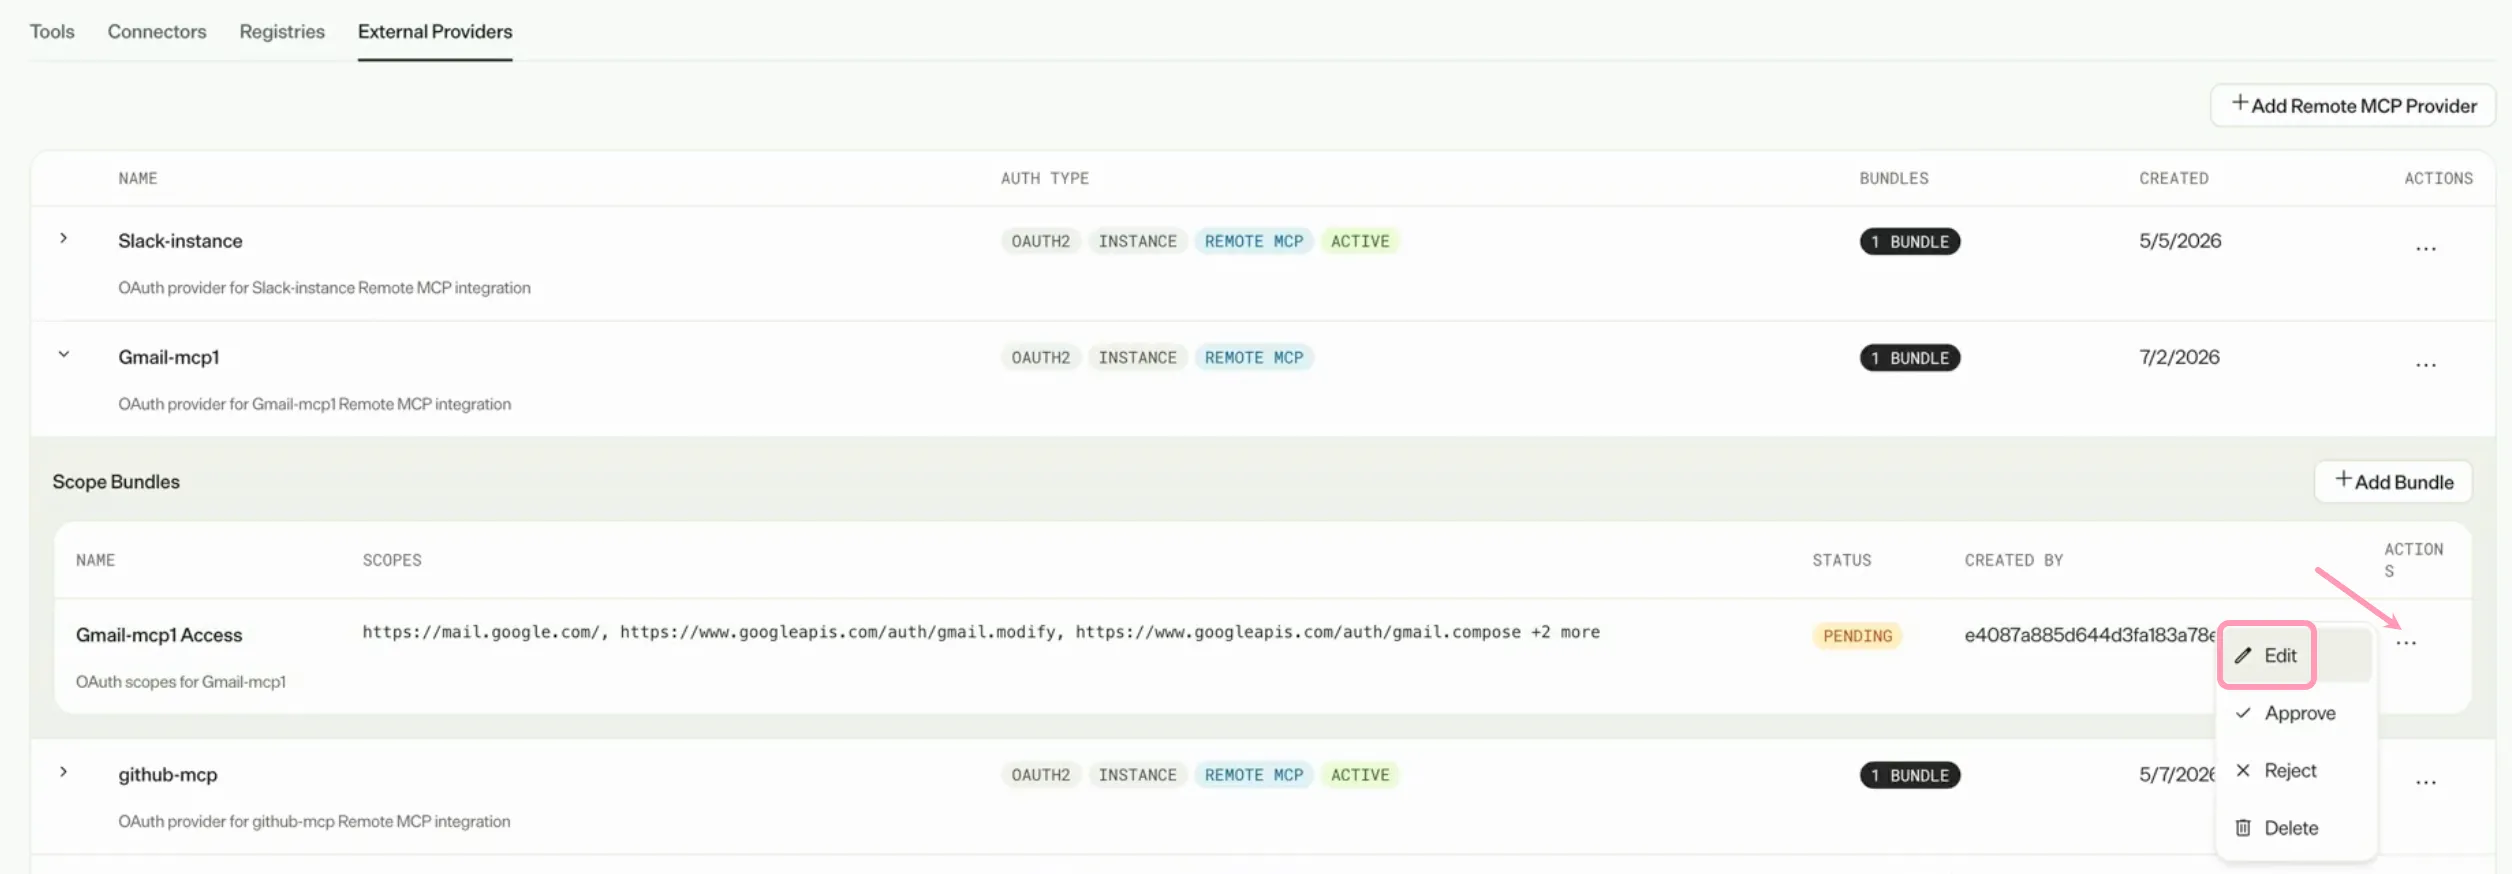
- (Optional) Enter a Display Name for the provider. The display name does not need to be globally unique.
- (Optional) Paste the Scalable Vector Graphics (SVG) representation of the Icon.
- Click Save Changes.
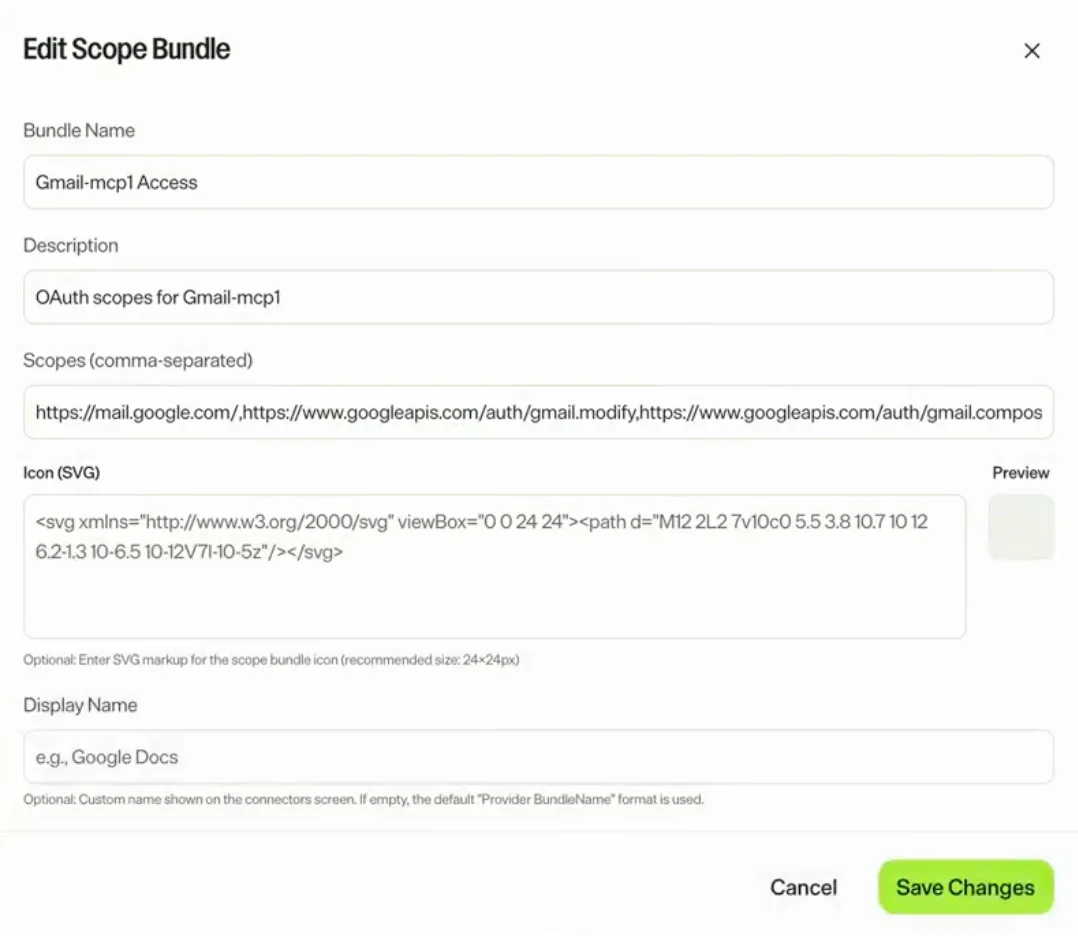
- Click More > Approve. This lets Mark users and agent builders connect and log in to the remote MCP server.
Add the tools
After you Register a remote MCP provider, you choose which of the provider's tools to make available to Mark users. To do so, complete the following steps:
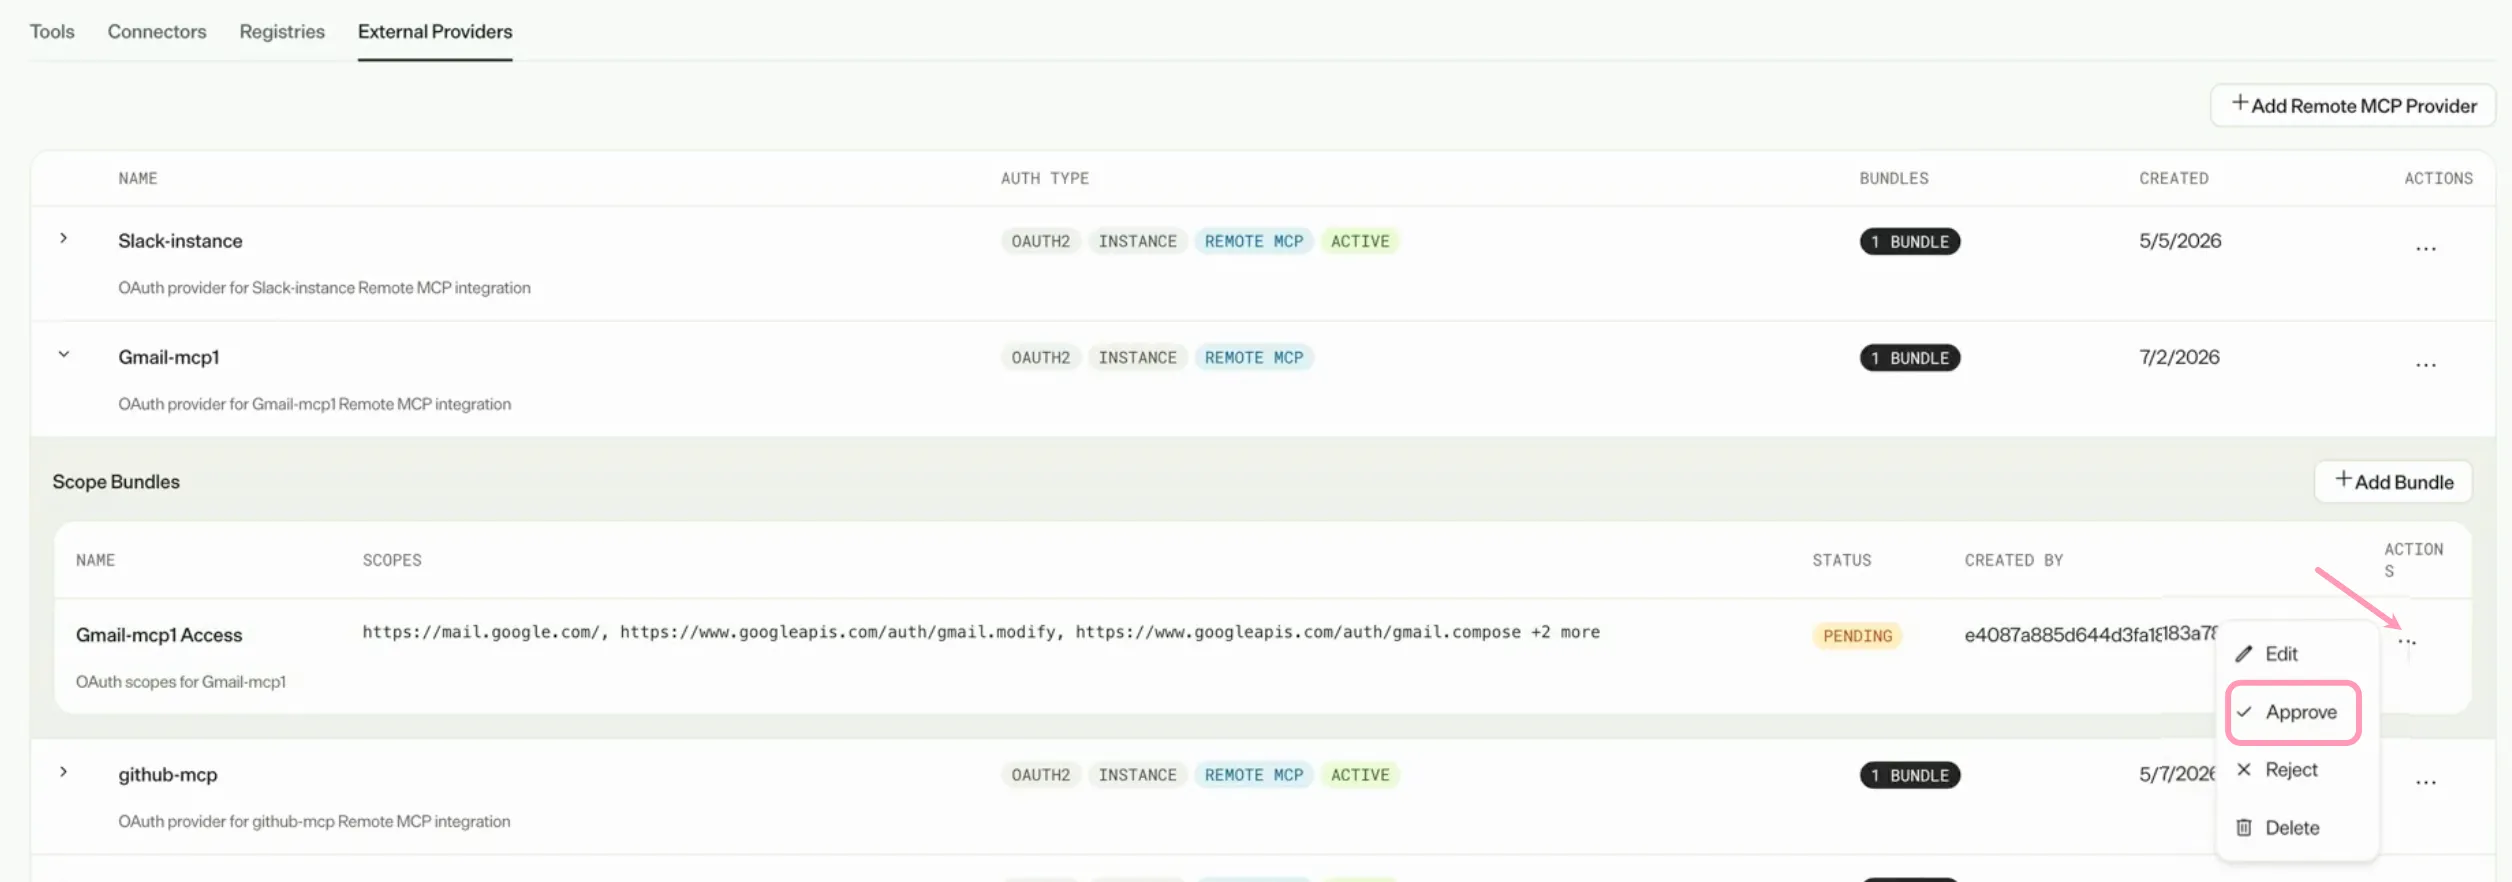
- Go to Connectors > Connectors.
- Click Connect for the provider you added in theRegister a remote MCP provider section.
- Log in to the remote MCP server.
- Grant Mark the access it requests.
- Click Continue.
- (Optional) Deselect any tools you do not want to add to Mark.
- (Optional) Update the Display Name for the tools.
- Click Finish.
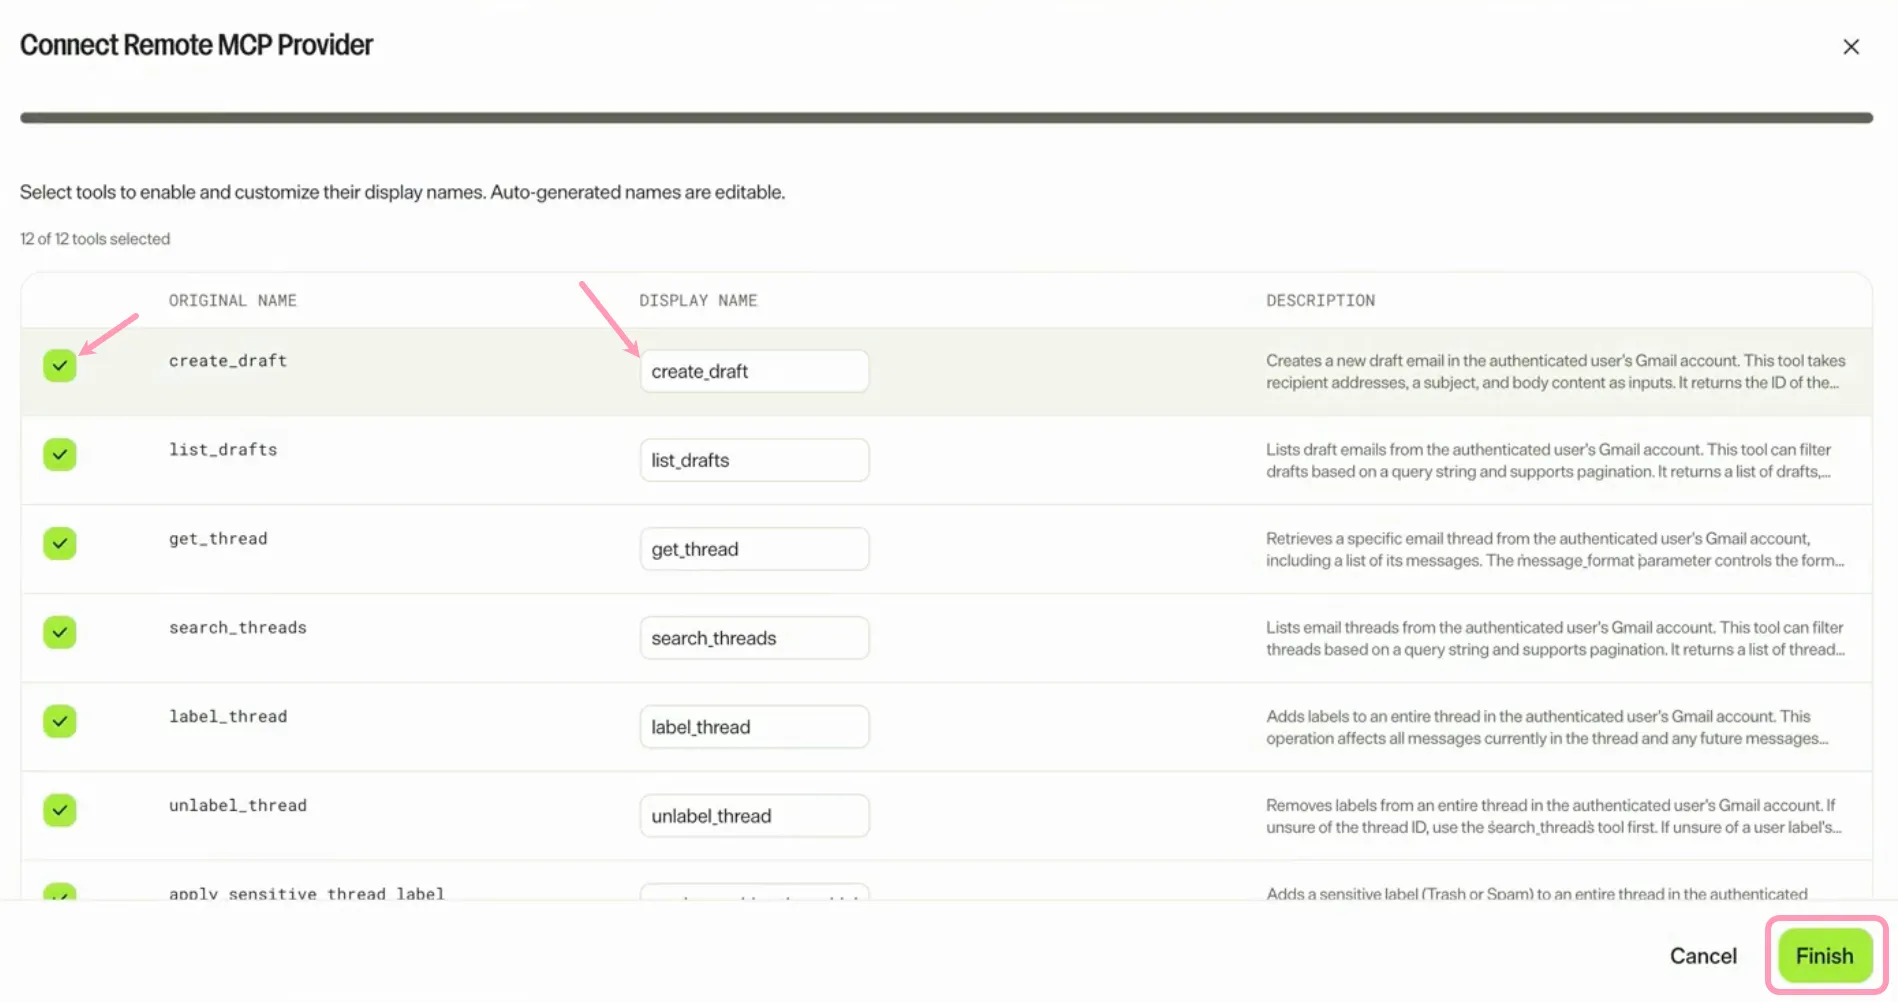
If tool discovery finds no tools, a warning and Retry display instead of the tool list. Click Retry to run tool discovery again.
The tools are available in your Mark instance. Saving the tools also approves a pending scope bundle. For details, see Approve the scope bundles.
To use the tools, Mark users and agent builders go to Connectors > Connectors and click Connect. They log in to the MCP server with their own credentials.
Enable the tools in Mark chat (Optional)
If you want the tools available in Mark chat, enable them.
- Go to Connectors > Tools.
- (Optional) Select Remote MCP from the Tool Type filter drop-down list.
- Toggle Enable for Chat on.
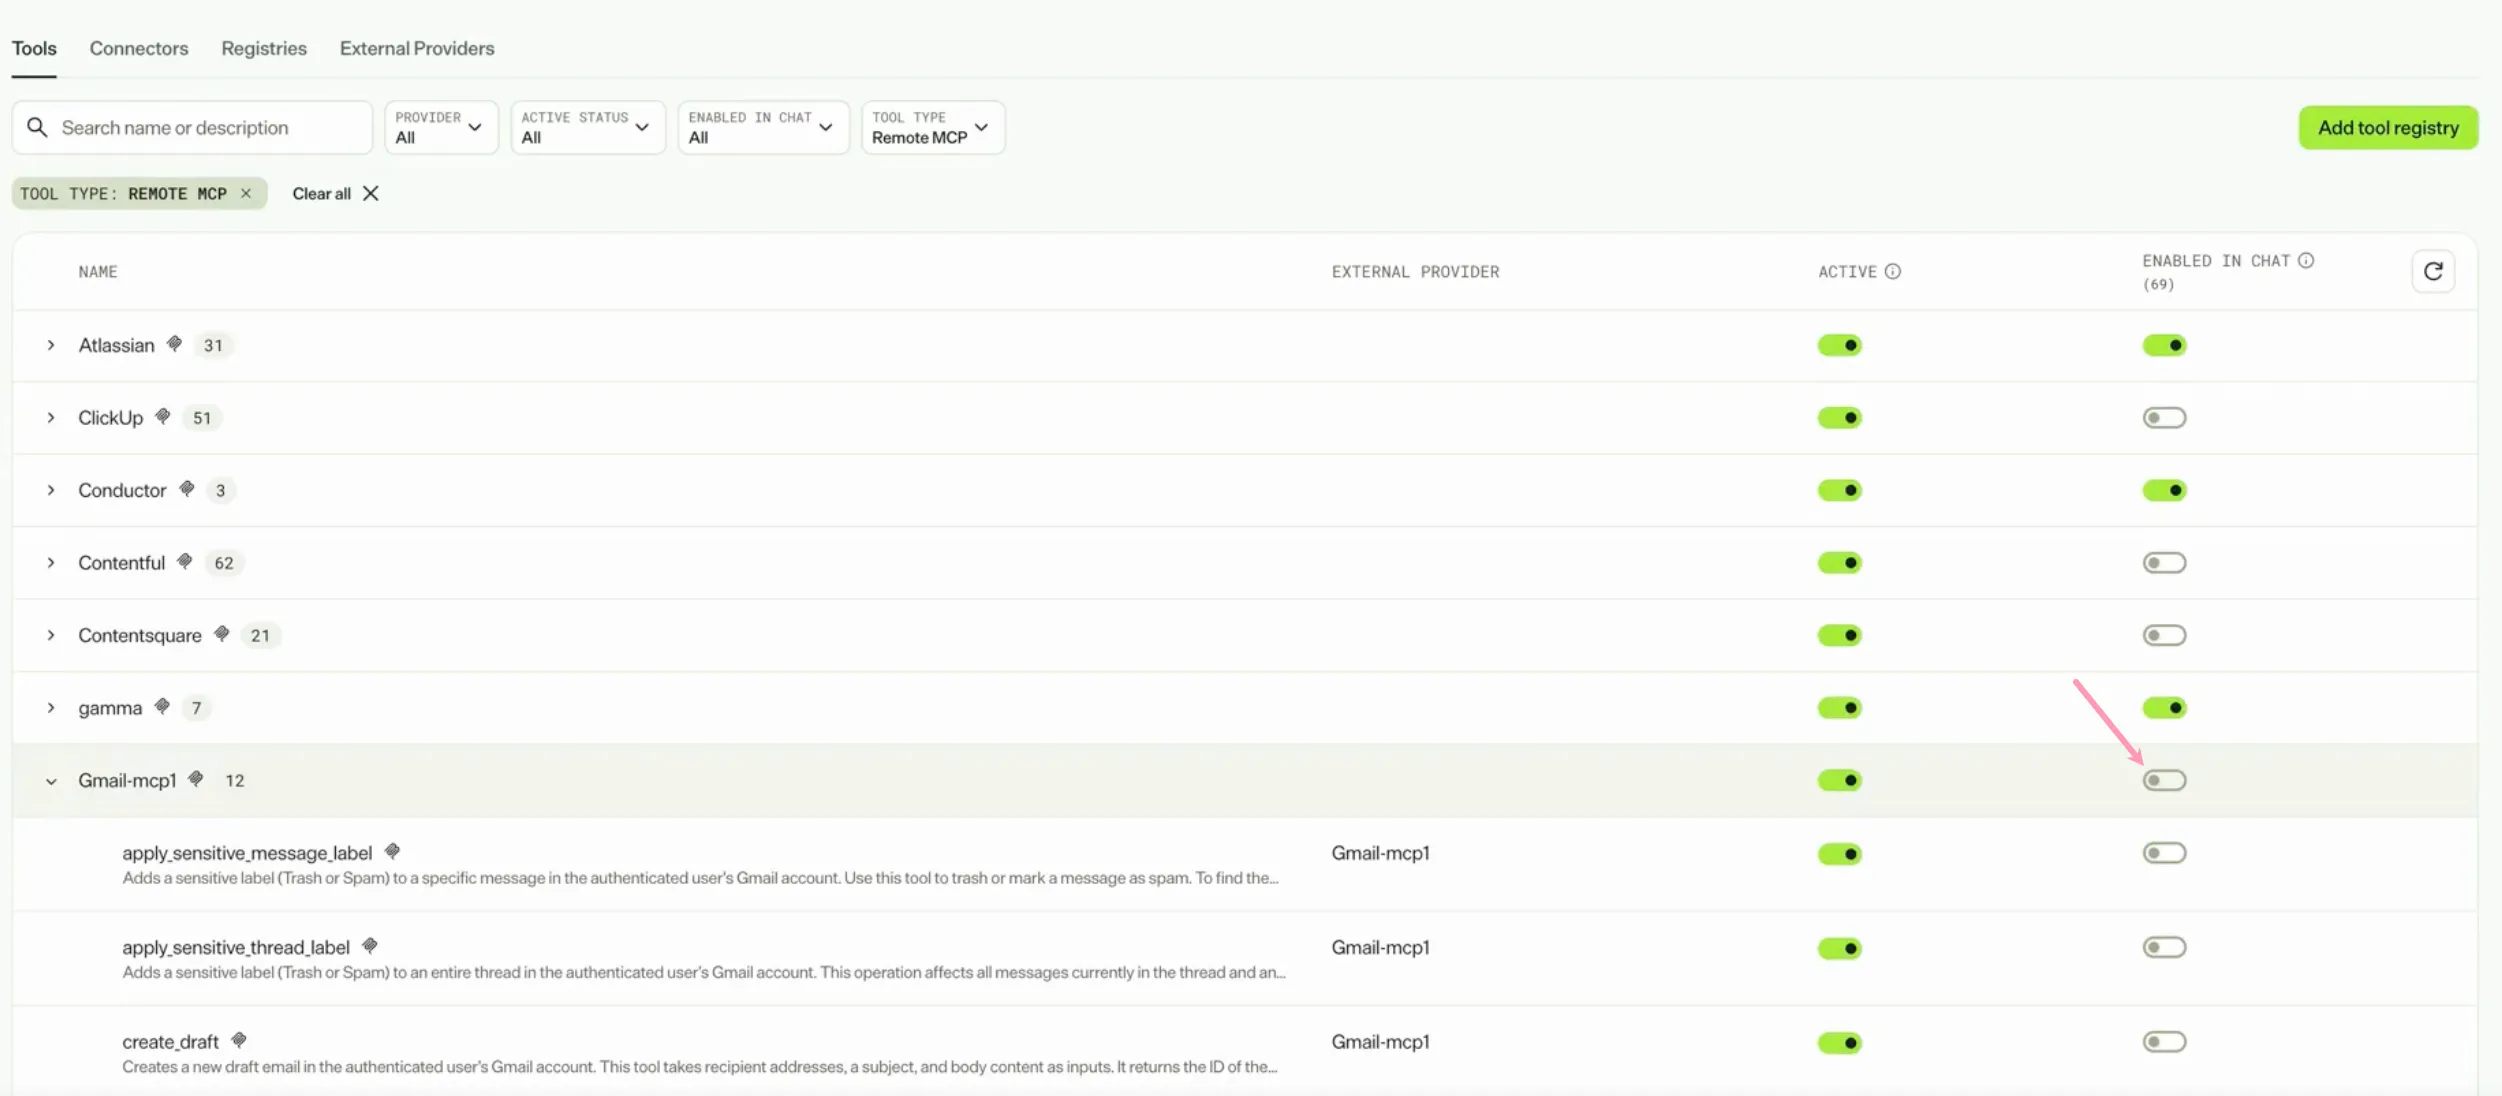
Mark can now reference the tools in Mark chat.
Manage additional headers
Some MCP servers need extra Hypertext Transfer Protocol (HTTP) headers, such as a tenant, workspace, or API version header. Add these headers to a remote MCP provider so Mark sends them with its requests to the MCP server. Headers work with bearer token and OAuth connectors.
Additional headers follow these rules:
- Mark sends the headers to the MCP server for tool discovery and tool calls. It never sends them to the OAuth authorization or token endpoints.
- A connector has up to 20 headers. Each value has up to 4,096 characters.
- Header names follow standard HTTP header rules.
- The Authorization header name is reserved. Mark blocks it.
When you register an OAuth provider, Mark saves the headers even when you select no scopes.
Edit the headers of a connector
Edit the headers of an installed remote MCP connector to add, change, or remove a header. Administrators who manage the connector see Edit headers on its connector card. The option is the same for bearer token and OAuth connectors.
- Go to Connectors > Connectors.
- Click Edit headers on the connector card.
- Review the header names that the dialog lists.
- Re-enter every header you want to keep, with its value.
- (Optional) Click Add Header to add another header.
- (Optional) Click Remove header to delete the header.
- Click Save Headers.
Important
The dialog replaces the full set of headers. Mark removes any header you do not re-enter, and saving an empty list clears all headers. Mark never displays header values again after you save them, so keep a copy of each value.
The bearer token dialog, which opens from Connect or Update Token, handles the token only. Saving a token leaves the stored headers unchanged. Disconnecting a bearer connector clears its headers.
Note
If you use Opti ID, administrators can turn off generative AI in the Opti ID Admin Center. See Turn generative AI off across Optimizely applications.