Figma remote MCP connector
The Figma remote Model Context Protocol (MCP) connector in Mark (Optimizely Agent Platform) brings your Figma designs into your Mark workflows. Use it to turn approved designs into Optimizely Web Experimentation test variations and Optimizely Content Management System (SaaS) pages. Designers and marketers move from design to launch without waiting for a development sprint.
Note
Mark (Optimizely Agent Platform) offers two Figma connectors, Figma and Figma MCP.
The Figma connector is managed by Optimizely and built on the Figma REST API. Only Figma REST API rate limits apply to it. For details, see Figma connector tools.
The Figma MCP connector, described in this article, uses Figma's official MCP server. Figma manages the server, which includes functionality that the REST API does not provide. Figma has stated that usage-based pricing may apply to its MCP server. See the Figma MCP server documentation for current details.
First, a Mark administrator must connect the Figma remote MCP to Mark. After the administrator adds the MCP server, individual Mark users and agent builders log in to Figma to access their designs from Mark. Administrators add the Figma remote MCP only once.
Use cases
Use the Figma remote MCP connector to include Figma designs in broader Mark workflows.
Before you start any use case, complete the following:
- Confirm that the Figma account connected to Mark has access to the Figma file.
- Copy the link to the specific Figma frame you want to use. Most read tools require a link that contains node-id in the URL.
- Open pages that require sign-in in your own browser. The Visual Editor automated browser cannot log in.
Turn a Figma design into a test variation
Run an approved Figma design as a Web Experimentation variation without a development ticket. For example, a designer hands over a hero frame, and you launch it as a test variation within hours instead of a sprint. Figma remains the reference for the design.
Keep the following in mind:
- Figma generates starter code in React and Tailwind. Convert it to HTML and CSS.
- Large layout rebuilds sometimes require custom code.
- Desktop and mobile layouts require separate frames.
Create design variants from the live control page
Generate two or three on-brand variations that match the page that is live. Stakeholders review realistic test arms before anyone builds them.
Keep the following in mind:
- Generated images use paid Figma AI credits.
- Approved variants still require the steps in Turn a Figma design into a test variation.
Create server-side CMS content variations from Figma
Test a Figma variant through Content Management System (CMS) content with no page flicker. Server-side tests run faster, protect search engine optimization (SEO), and let editors maintain variations in the CMS. This approach works best for copy and image tests.
Keep the following in mind:
- Variations work only on pages and experiences, not on standalone blocks.
- Publish the default version before you publish the variation.
Build a Visual Builder page from a Figma landing page
Build a campaign landing page designed in Figma from existing CMS components. The result is a draft page that matches the design and is ready for editor review. No developer is needed when the components already exist.
Keep the following in mind:
- Sections with no matching CMS component require you to first complete Create CMS content types and display templates from Figma components.
- Confirm which content types and blueprints your CMS has before you start.
Create CMS content types and display templates from Figma components
Turn a component that the design team adds in Figma, such as a pricing card with light and dark themes, into an editable CMS block that matches it. Figma, code, and the CMS stay in sync, and editors get the same options that designers use.
Keep the following in mind:
- A developer must still build the code component.
- Link the component back to Figma after the developer builds it.
Connect the Figma remote MCP to Mark
Note
The first person to connect a third-party service to Mark should be an administrator of that service. Administrator access installs the complete set of tools, so Mark adds every available tool. If a non-administrator connects the service first, Mark installs only the tools that account can access.
Mark administrators connect and grant access to Figma from Mark. After granting access, administrators select which tools to enable in Mark and optionally customize their display names.
Add Figma connection
As a Mark administrator, complete the following steps:
- Go to Connectors in Mark.
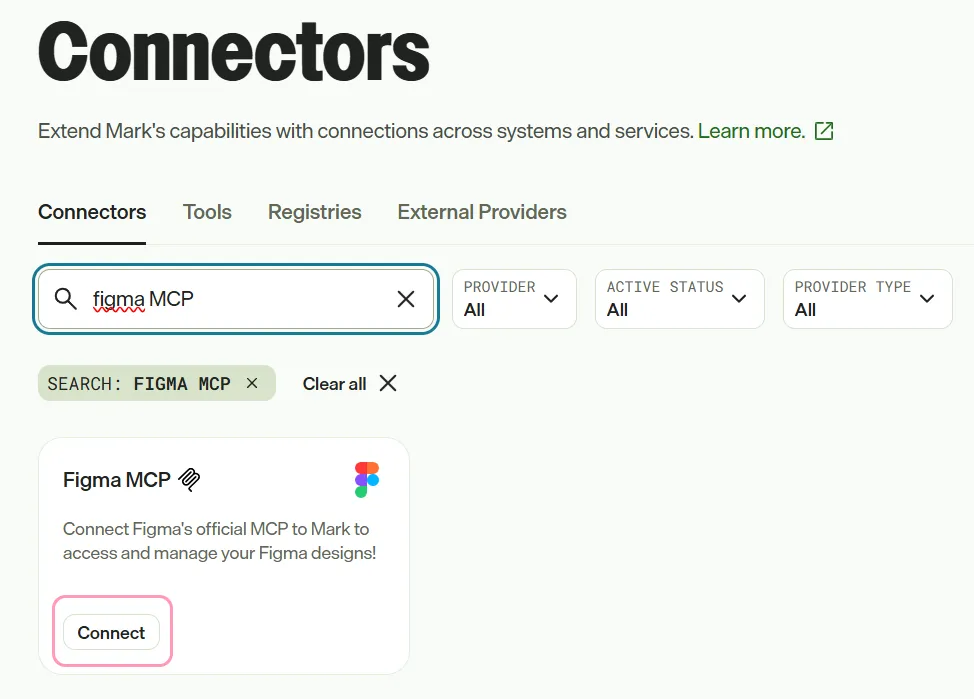
- (Optional) Enter Figma MCP in the search bar to filter the connectors list.
- Click Connect on the Figma MCP tile.
- Log in to your Figma account.
- Click Agree & Allow Access.
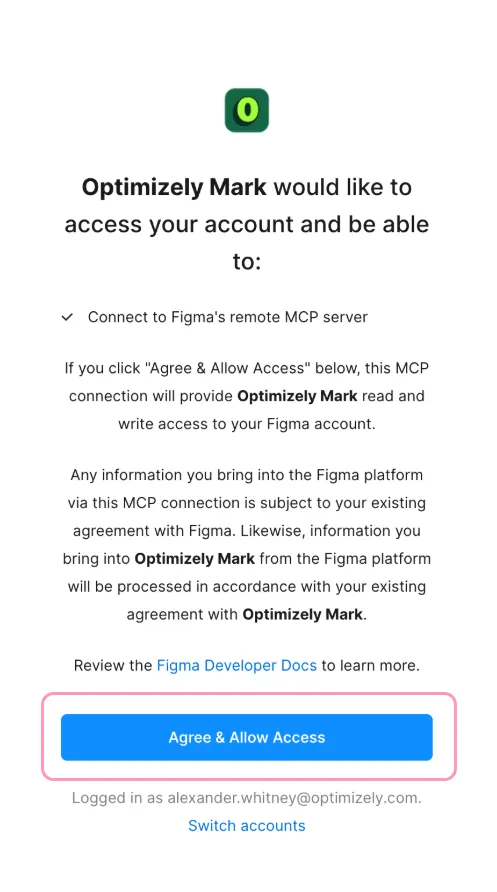
A confirmation message displays and you can close the pop-up window.
Configure Mark tools
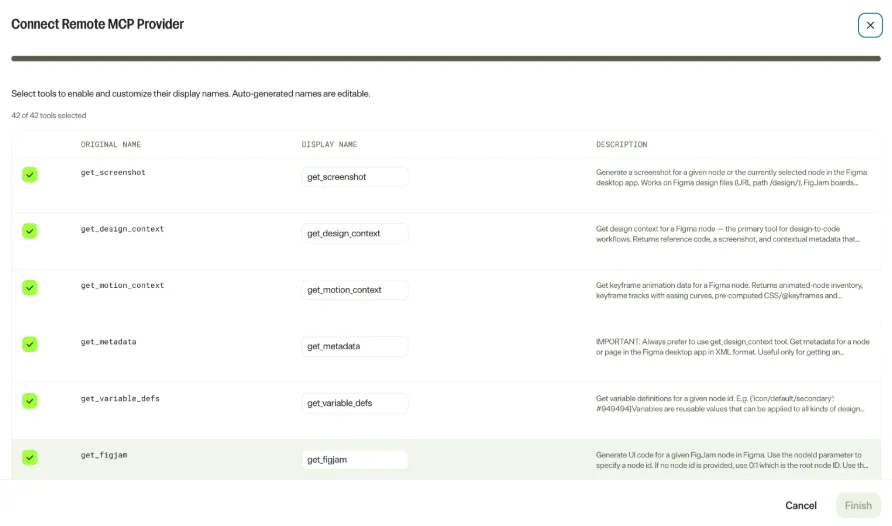
After adding the Figma connection, Mark prompts you to select which tools to enable and optionally customize their display names.
As a Mark administrator, complete the following steps:
- Deselect any tools you do not want to add to Mark.
- (Optional) Update any tool's display name.
- Click Finish.
The Figma MCP tile displays Connect on the Connectors tab for Mark users to authenticate with their personal accounts.
To update the available tools or names, see Update tools.
Authenticate with Figma
Each Mark user and agent builder logs in to Figma individually to access their Figma data from Mark. User-level authentication ensures you access only the data your Figma account is authorized to view.
Note
Before you begin, confirm that a Mark administrator has connected the Figma remote MCP to Mark. Until an administrator connects it, the Figma MCP tile displays Contact admin instead of Connect and you cannot select it.
To authenticate, complete the following steps in Mark:
- Go to Connectors.
- (Optional) Enter Figma MCP in the search bar to filter the connectors list.
- Click Connect on the Figma MCP tile.
- Log in to Figma.
After you log in to Figma, the Figma connector tools your administrator added become available in Mark chat, agents, and workflows.
Figma remote MCP tools
The Figma connector tools are available in Mark after an administrator connects the Figma remote MCP to and you log in to Figma. The available tools depend on which tools your administrator enabled. For a full list of available tools and actions, see the Figma MCP server documentation in Figma.
Update tools
To rename, add, or remove tools, a Mark administrator must delete the Figma tools registry and re-add it. To do so, complete the following steps:
- Follow the steps in Delete a tool registry.
Note
If you use Opti ID, administrators can turn off generative AI in the Opti ID Admin Center. See Turn generative AI off across Optimizely applications.