Agent Directory overview
Install ready-made agents that Optimizely publishes from the Agents section of the Directory in Mark (Optimizely Agent Platform). Each agent handles a specific task, such as reviewing content, analyzing data, or generating marketing copy. Install an agent instead of building one, then run it as is or edit it to fit your work.
Each agent is a specialized agent or a workflow agent. Mark Administrators and Agent Builders install and manage agents in the Agents section. Mark users discover and run a curated subset of these agents in the Agent Library.
The Directory also includes the Virtual Teammates and Skills sections. For an overview of the three sections, see Directory overview.
Prerequisites
Confirm the following before you install an agent:
- You have permission to install the type of agent. Without it, request the agent instead.
- Your organization has generative AI enabled.
- Your organization uses at least one of the Optimizely products that the agent requires.
- Your Mark instance has workflow agents available. This applies only to workflow agents.
Note
Mark Administrators, Agent Builders, and users with the Add, edit, and install specialized agents attribute for a custom role can add agents to their organization's Mark instance. See Add users and set permissions.
Access the Agents section
- Log in to Optimizely.
- Select your organization.
- Select your Mark instance.
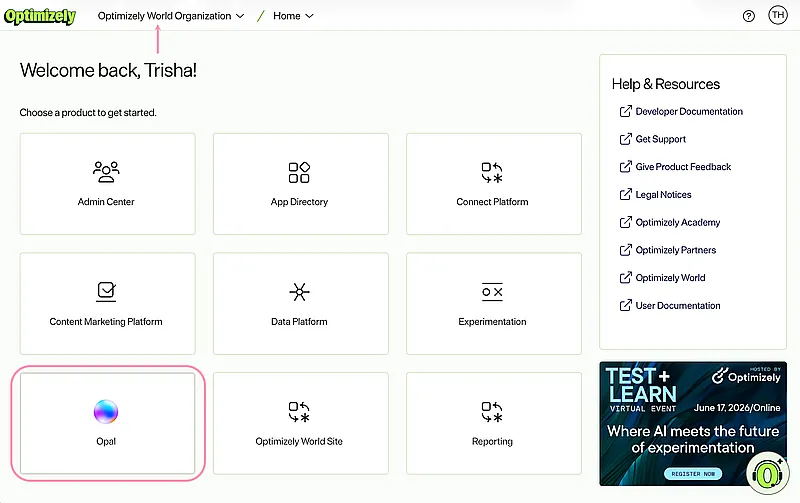
- Click Directory > Agents.
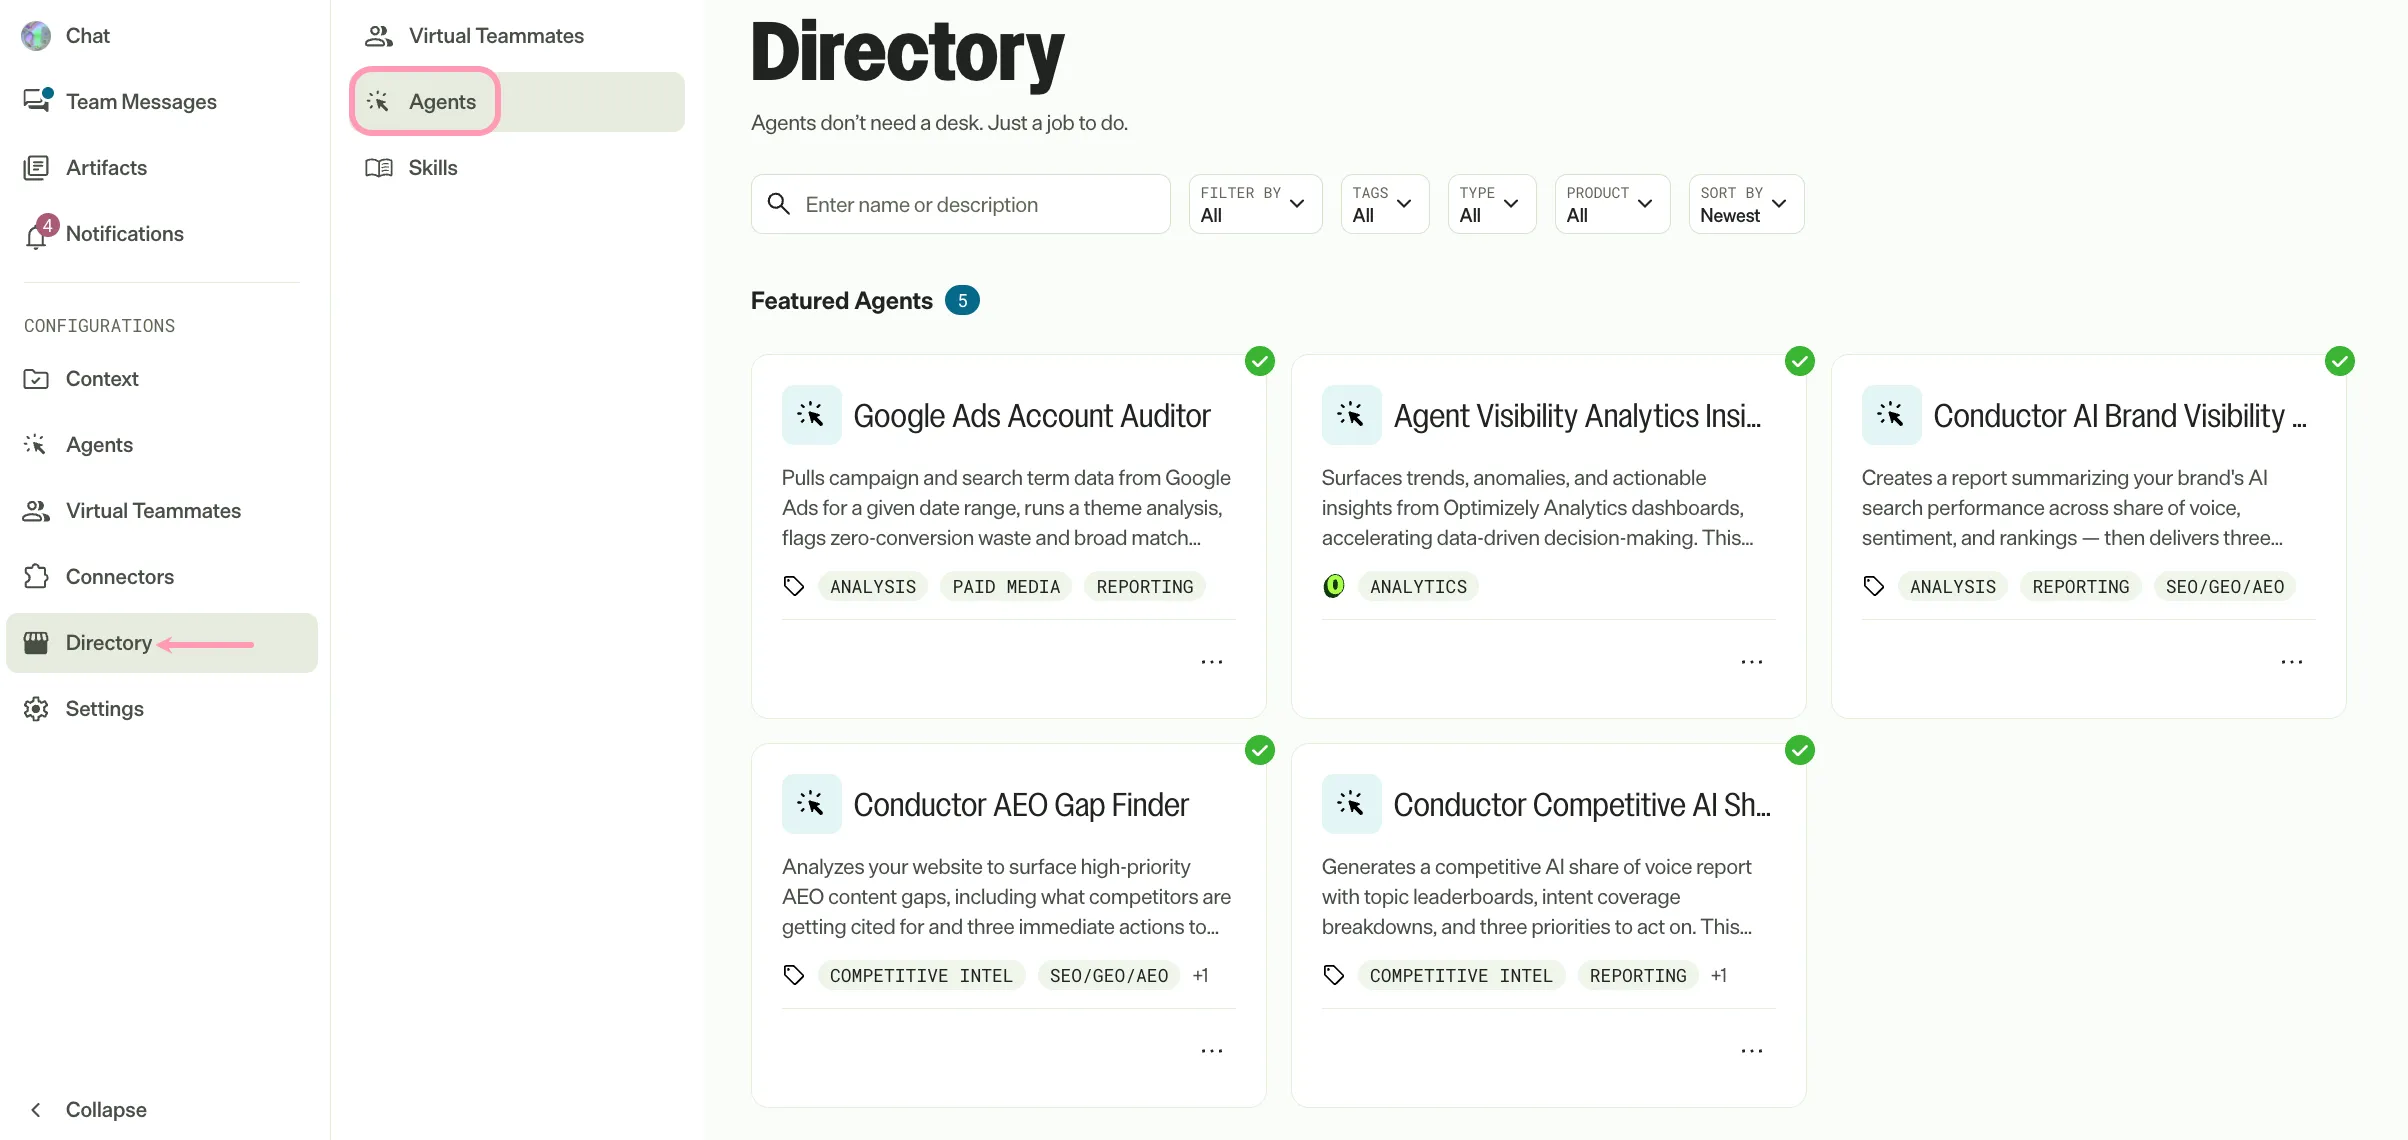
Available agents
The Agents section groups agents into the following sections:
- Featured Agents – Agents that Optimizely highlights.
- Brainstorm & Plan, Create, Experiment & Analyze, Optimize, and Productivity – Agents grouped by use case.
- Other – Agents that do not belong to a use case.
Each section previews up to nine agents. Click View all to display every agent in a section.
For the full list with a description of each agent, see Agents in the Agent Directory.
Find an agent
Narrow the list of agents with the following search and filter options:
- Search bar – Enter a name or a word from a description to find a specific agent.
- Filter by – Select Installed or Not installed to display only those agents. Select All to display every agent.
- Tags – Select a tag to display only the agents with that tag.
- Type – Select Specialized agent or Workflow agent to display only that type of agent. Select All to display every agent.
- Product – Select an Optimizely product to display only the agents that require it.
- Sort by – Sort the agents by Newest, Oldest, A-Z, or Z-A.
Click Clear all to remove the filters you applied.
Compare agents
Each agent card displays the agent's type, name, description, tags, and required products. An installed agent displays an Installed indicator.
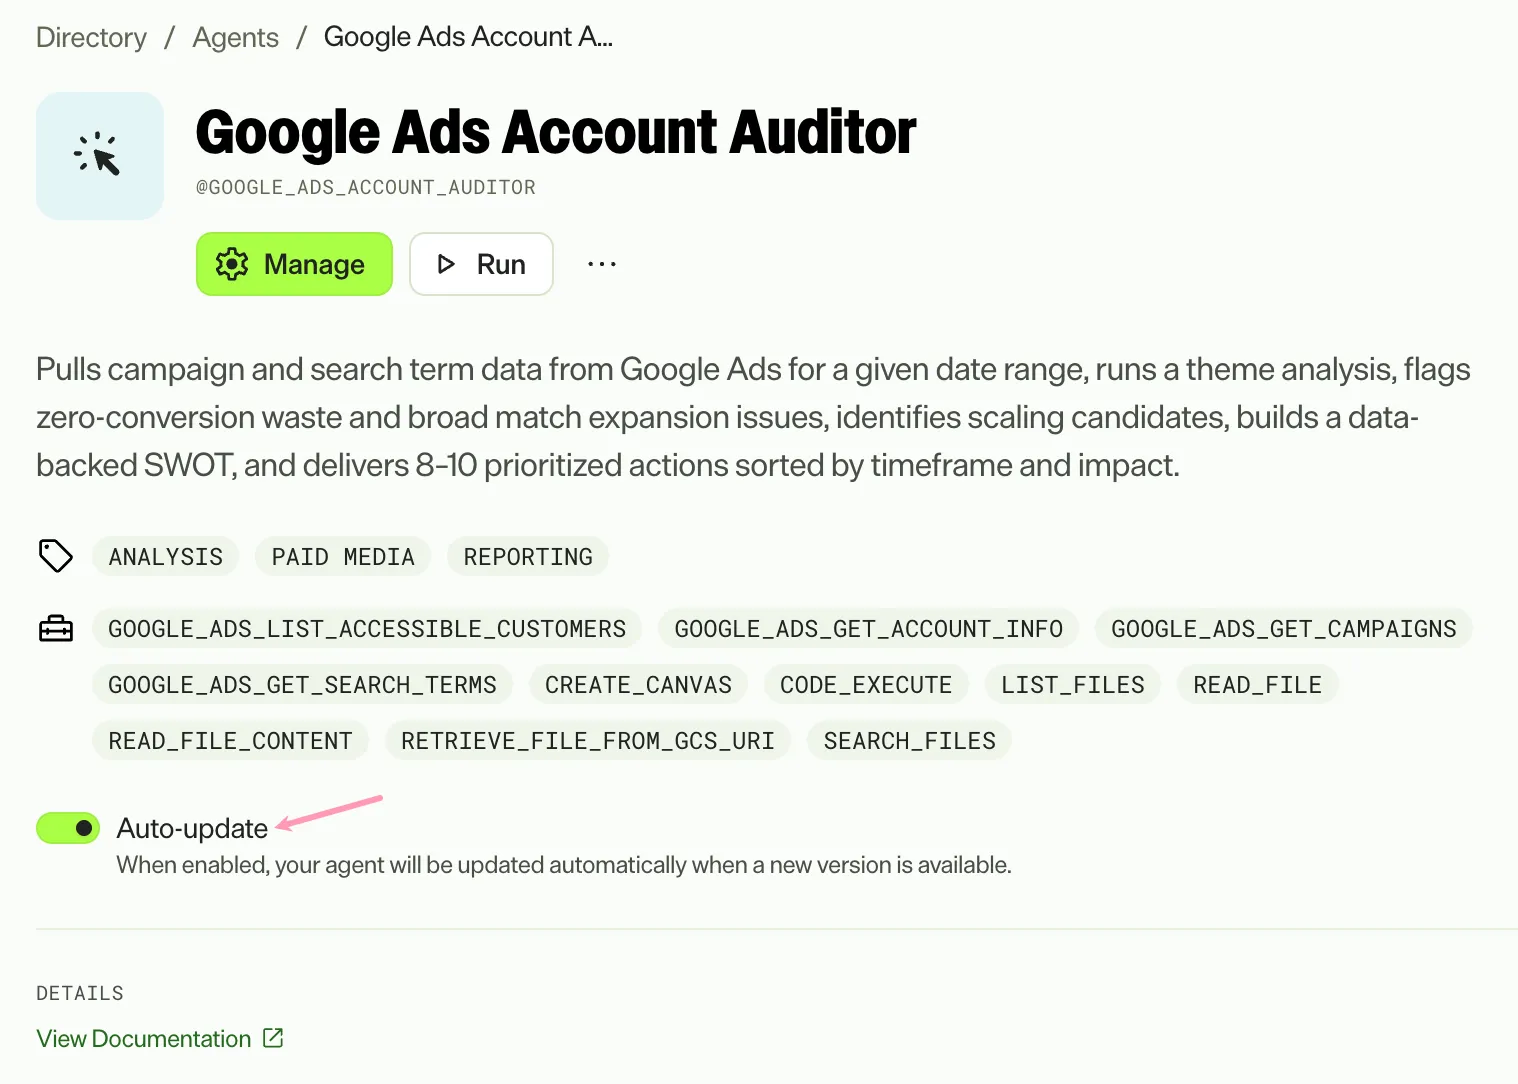
Click an agent card to open its details page. The details page includes the following information:
- Handle – The name that starts with @, which you enter in Mark chat to run the agent.
- Description – What the agent does. For a workflow agent, a preview of the workflow follows the description.
- Tags – The agent's categories.
- Enabled tools – The tools the agent uses.
- Required Products – The Optimizely products your organization needs to install the agent.
- Details – Information about the agent, with a View Documentation link when documentation is available.
- Auto-update – A toggle that displays after you install the agent.
Optimizely manages and updates some agents. To customize one of these agents, create a copy. See Optimizely-managed agents overview.
Install or request an agent
The label on an agent card depends on the agent's status and your permissions.
Label | When it displays | What it does |
|---|---|---|
Install | The agent is not installed, and you have permission to install it. | Installs the agent in your Mark instance. |
Request | The agent is not installed, and you do not have permission to install it. | Notifies the administrators of your Mark instance. After you send a request, Request changes to Requested and stays disabled for 12 hours. |
Installed agent actions | The agent is installed. | Opens a menu with Manage (or View), Update, and Uninstall. Update displays only when an updated version is available and auto-update is off. |
Install is unavailable in the following situations:
- Your organization does not use any of the Optimizely products that the agent requires.
- The agent is a workflow agent, and workflow agents are not available for your Mark instance.
Hover over Install to see why it is unavailable.
Install an agent
- Click Install on the agent card or on the agent's details page.
- (Conditional) Click Connect for each connector that the agent uses if the Set up connectors dialog displays.
- Click Install, or click Install anyway to connect the remaining connectors later.
If a connector displays Needs admin, ask an administrator to configure it. Connect connectors later from the Connectors page. See Connectors tab overview.
When you install a workflow agent from its card, the import wizard opens instead. See Import a workflow agent.
After you install an agent, Mark adds it to the Your Agents tab of the Agents page. Click View Agent in the confirmation message to open it. Edit an installed agent like any specialized agent. See the following documentation:
Request an agent
If you do not have permission to install an agent, request it from an administrator.
- Click Request on the agent card or on the agent's details page. Mark notifies the administrators of your instance.
- Wait for an administrator to install the agent.
Run an installed agent
Open the agent's details page and click Run. Mark chat opens with the agent's handle entered. Add your request and send it.
Update an agent
Auto-update keeps your installed agents current without manual action. When Optimizely publishes an updated version of an agent, every instance with auto-update turned on receives it. Mark turns on auto-update by default for every agent installed from the Directory.
Auto-update applies only to agents installed from the Directory, based on installation records. It does not affect agents you created, even ones with the same name.
To update an agent that has auto-update turned off, complete the following steps:
- Click Installed agent actions on the agent card.
- Select Update.
- Click Update Agent to confirm.
Warning
Updating a specialized agent permanently removes its version history and the changes you made to it. For a workflow agent, review the changes and resolve any conflicts in the next step.
Turn off auto-update
Turn off auto-update to keep your changes to an installed agent. Users with permission to install agents can change this setting.
- Go to Directory > Agents.
- Click the agent card.
- Turn off Auto-update.
Edit an agent that has auto-update turned on
If you save changes to an installed agent with auto-update turned on, the Auto-update is on dialog displays. A future update overwrites your changes. To keep them, turn off Auto-update in the dialog, then click Save.
Uninstall an agent
Uninstall an agent to remove it from your Mark instance. Uninstalling permanently deletes the agent, its logs, its execution history, and its run IDs. You cannot undo it.
- Click Installed agent actions on the agent card.
- Select Uninstall.
- Click Uninstall to confirm.
Reinstall the agent from the Agents section at any time.
Note
If you use Opti ID, administrators can turn off generative AI in the Opti ID Admin Center. See Turn generative AI off across Optimizely applications.