Add a custom tool to Optimizely Opal
After creating a custom tool, you must add it to Optimizely Opal. Your tool must be hosted on a publicly accessible URL so Opal can connect to it.
You can host your tool yourself or use Optimizely Connect Platform (OCP), which provides integrated hosting and seamless deployment with the Optimizely ecosystem.
Host options
Self-host
You can host your tool on any platform with a public URL, including Vercel, Netlify, Amazon Web Services, Azure, Google Cloud Platform, or your own self-managed servers.
The only requirement is that your tool's /discovery endpoint is publicly accessible. See Deploy your self-hosted custom tool for steps to add your tool to Opal.
Host with OCP
OCP provides a managed environment for hosting custom tools. It simplifies deployment, handles infrastructure, and lets you publish your tool in the Optimizely App Directory.
In OCP, Opal tools are implemented as OCP Functions, which are event-driven services triggered by HTTP requests, usually from the Opal AI Assistant. You focus on your tool's logic while OCP manages scaling and reliability.
See Deploy your custom tool with OCP for steps.
Deploy your self-hosted custom tool
Initial configuration
Before adding your tool to Opal, ensure it has an HTTP endpoint (commonly /discovery) exposed. See Create custom tools for guidance.
Register your tool in Optimizely Opal
Complete the following steps in Opal:
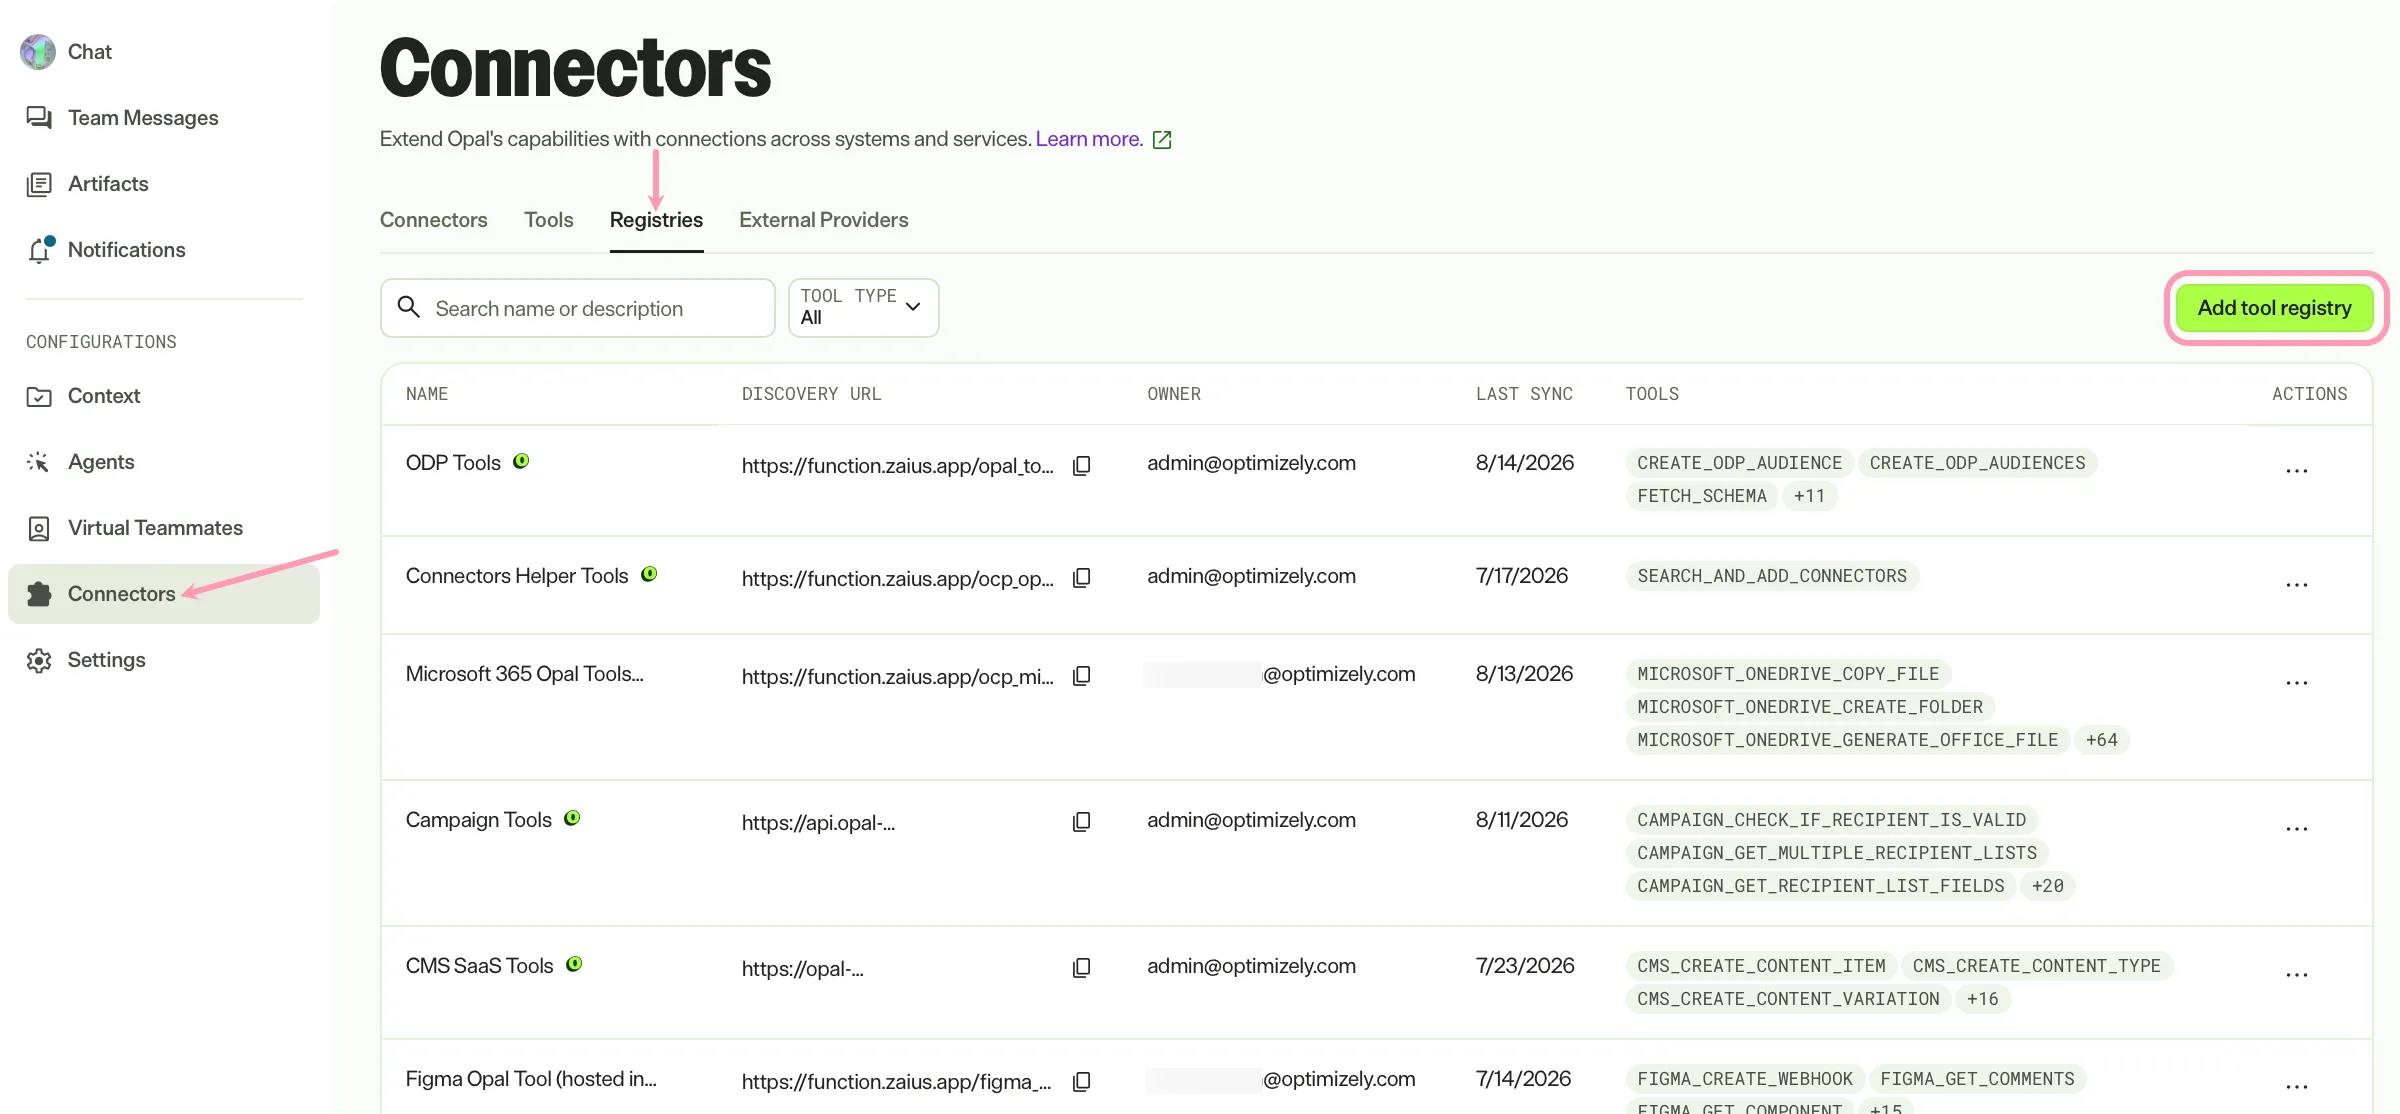
- Go to Connectors > Registries.
- Click Add tool registry.
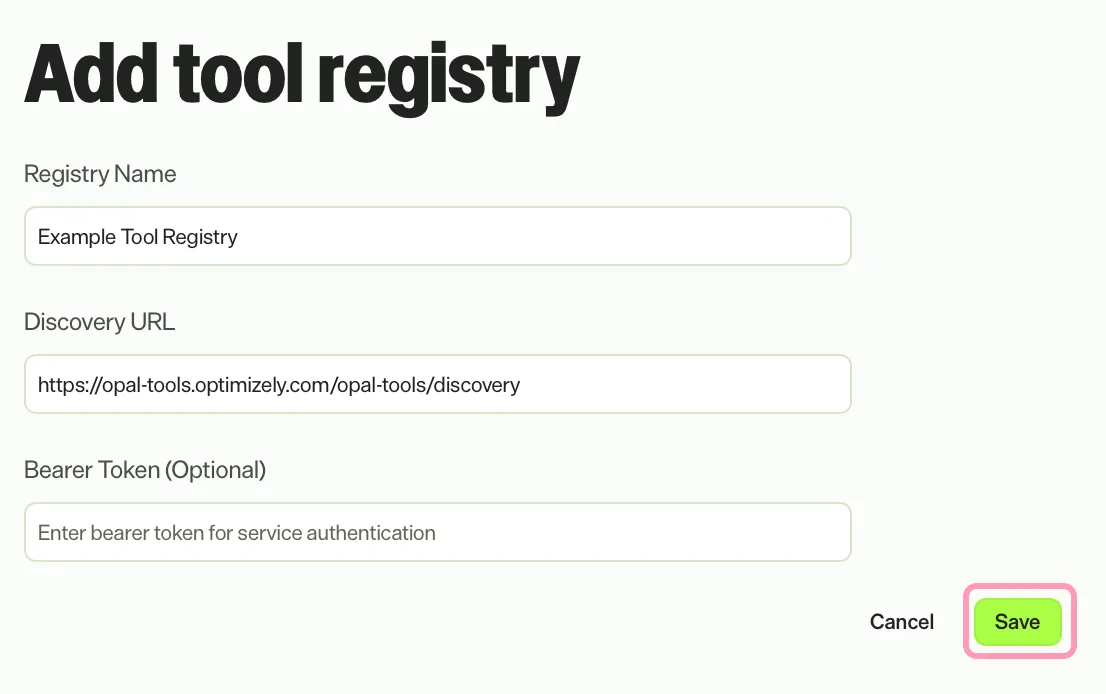
- Enter a Registry Name.
- Enter your tool's discovery HTTP endpoint in the Discovery URL field.
- (Optional) Enter your authentication information in the Bearer Token (Optional) field if you configured custom bearer token authentication or OAuth for your tool.
- Click Save.
Your Opal tools are now discoverable and available for use within Opal.
Deploy your custom tool in OCP
Prerequisites
- An OCP developer accountOCP developer account.
- A configured OCP development environment, including the OCP Command Line Interface (CLI) OCP Command Line Interface (CLI).
- An initialized Git repository for your Opal tool project.
- A completed Opal tool. See Create custom tools for instructions.
Project configuration
- Clone the Opal tool sample app GitHub repository or download its ZIP file.
- Use the OCP CLI to register your application. Run the following command:
ocp app register- Enter a unique App ID (use snake_case, no spaces).
- Enter a Display Name for your app.
- Select Connect Platform as the target product.
- Choose whether to make the app private or share it within your organization. Choose No if you intend to share it within your organization.
Configure and define your tool
- Open app.yml in your project's root directory.
- Update meta/app_id and meta/display_name to match the values you provided during registration.
- Set meta/vendor (you can find your vendor ID running ocp accounts whoami).
- Add meta/summary, meta/support_url, and meta/contact_email for the OCP App Directory listing.
- Define your Opal Tool function under the functions section. Adding opal_tool: true makes OCP display an extra section in app settings form that lets users register your app in Opal.
functions:
  opal_tool: #A unique key for your function.
    entry_point: OpalToolFunction #The name of the class implementing your tool.
    description: Opal tool function #A brief description of this function.
opal_tool: true #Lets users register your app in Opal.- The entry_point should be the class name (for instance, OpalToolFunction) that contains your Opal Tool logic. This class must extend the Function class from @zaiusinc/app-sdk (for TypeScript and JavaScript projects).
- The perform() method within your entry_point class handles requests from Opal, including /discovery for tool metadata and specific tool execution endpoints (for example, /tools/greeting).
- OCP functions support standard parameter types like string, integer, number, boolean, array, and object.
- Confirm your settings are correct before deploying your app by running the following command:
ocp app validateCustom configuration and authorization
OCP provides secure ways to handle app-specific settings and authentication.
- Custom settings – Define custom input fields in forms/settings.xml to let users configure your tool within the OCP App Directory UI.
- Authentication
- Username and password
- Declare input fields (for example, email or api_key) and an authorize button in forms/settings.xml.
- Implement validation in the onFormSubmit method of src/lifecycle/Lifecycle.ts.
- Access stored credentials with storage.settings.get().
- OAuth
- Add an oauth_button to forms/settings.xml.
- Implement onAuthorizationRequest and onAuthorizationGrant in your Lifecycle class to manage the OAuth flow.
- Access tokens should be stored and retrieved from OCP's secure secret storagesecret storage using storage.secrets.get().
OCP storage and secrets
OCP offers various storage types for your app.
- Secrets storeSecrets store – Stores sensitive information (for example, API keys or database credentials) that should not be exposed in settings forms.
- Settings storeSettings store – Backs the settings form, which is suitable for non-sensitive configuration data.
- Key value storeKey value store – Is a general-purpose storage for simple data structures (for example, lists or sets), high throughput, up to 400 KB per record.
- Shared key value storeShared key value store – Shares common data between app components.
Customize your app
Dependencies
You can add external libraries to your OCP app using your language's package manager (for example, npm install axios for Node.js).
Logs and notifications
- Use the logger from @zaiusinc/app-sdk for logging events (info, warn, debug).
- Logs are accessible in the OCP App Directory's Troubleshooting tab or through the ocp app logs command.
- Log levels can be changed with the ocp app set-log-level command.
- See App logs and how to troubleshootApp logs and how to troubleshoot in the OCP documentation.
- Use notifications from @zaiusinc/app-sdk to send notifications to the OCP Activity LogOCP Activity Log.
App overview and assets
- Customize your app's presentation in the OCP App Directory by editing directory/overview.md.
- Replace assets/logo.svg with your own icon. You should use 150 x 50 pixels for the size.
Deploy to OCP
Before deploying, prepare your app for publication by running the following command:
ocp app prepare --bump-dev-version --publishNote
The --bump-dev-version flag increases the app version in app.yml for upgrades.
Install your app to the sandbox OCP account by running the following command:
ocp directory install YOUR_APP_ID@YOUR_APP_VERSION PUBLIC_API_KEY- YOUR_APP_ID and YOUR_APP_VERSION are from your app.yml or the ocp app prepare calls output.
- PUBLIC_API_KEY can be found in your OCP UI (Settings > APIs) or by running ocp accounts whoami.
Note
OCP handles auto-upgrades based on semantic versioning, so installation is usually a one-time step.
Register your tool in Optimizely Opal
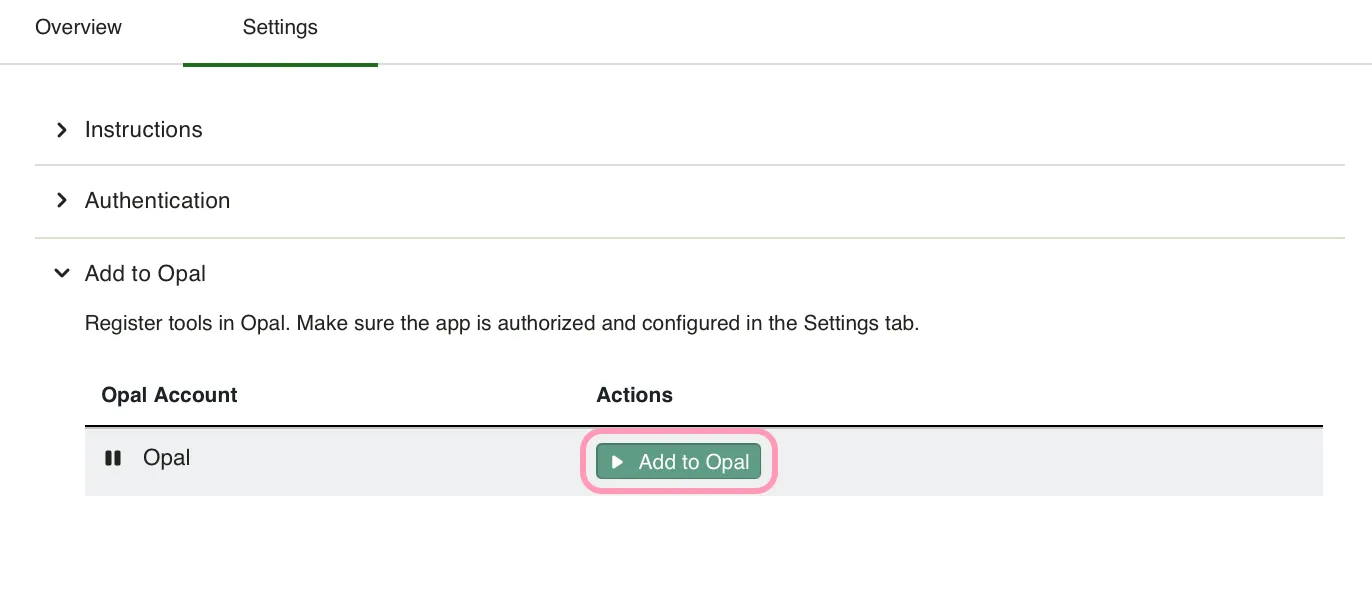
After your OCP app is deployed and running, users can now add your app to Opal.
Note
If you use Opti ID, administrators can turn off generative AI in the Opti ID Admin Center. See Turn generative AI off across Optimizely applicationsTurn generative AI off across Optimizely applications.