Categories
Categories in Optimizely Analytics let you organize your workspace by assigning entities (like dashboards, events, and more) to a category. This makes it easier to find, manage, and govern your workspace at scale. You can categorize by team or product, or designate them as verified to reduce clutter, establish ownership, and enable faster navigation.
Usage
Categories help you organize and discover relevant content across Optimizely Analytics by tagging key entities with shared, meaningful labels.
Manage categories
- Apply categories to the following objects:
- Goal trees
- Assign one or more categories to any supported object.
- Manage categories centrally, allowing for consistent usage across your organization.
Filter by category
- Filter by category in key areas such as the datasets page, the home page, and select menus.
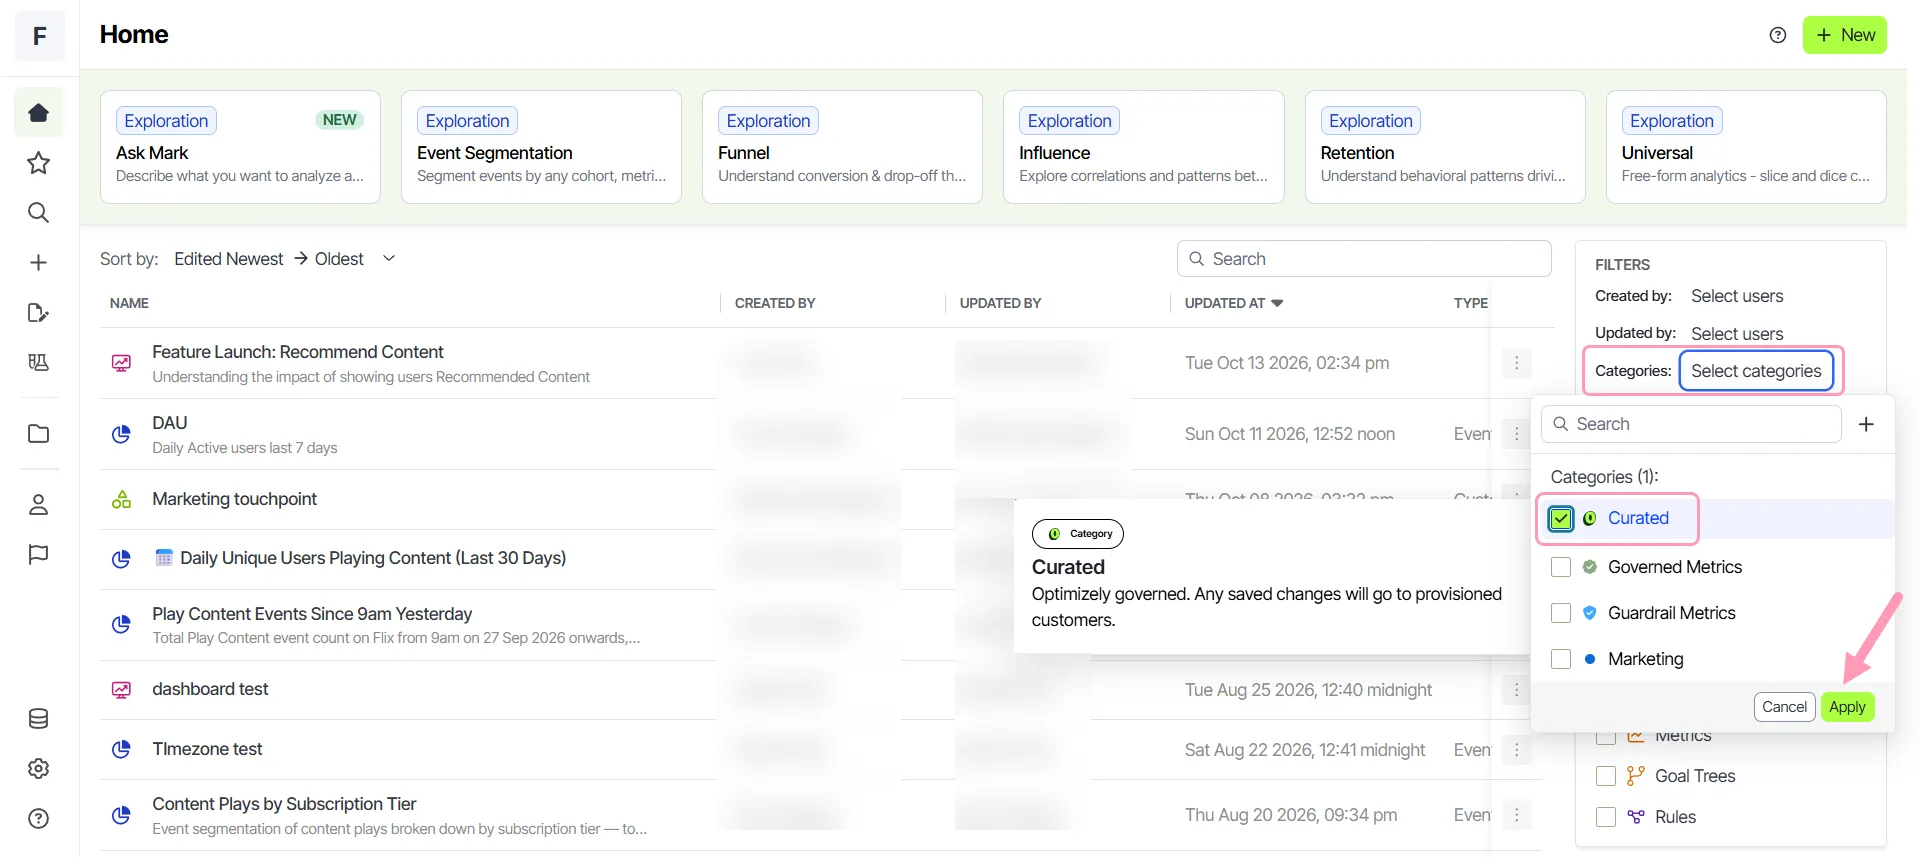
- Discover relevant content, narrow down objects based on team, use case, or business area, and surface trusted or approved metrics through consistent metadata.
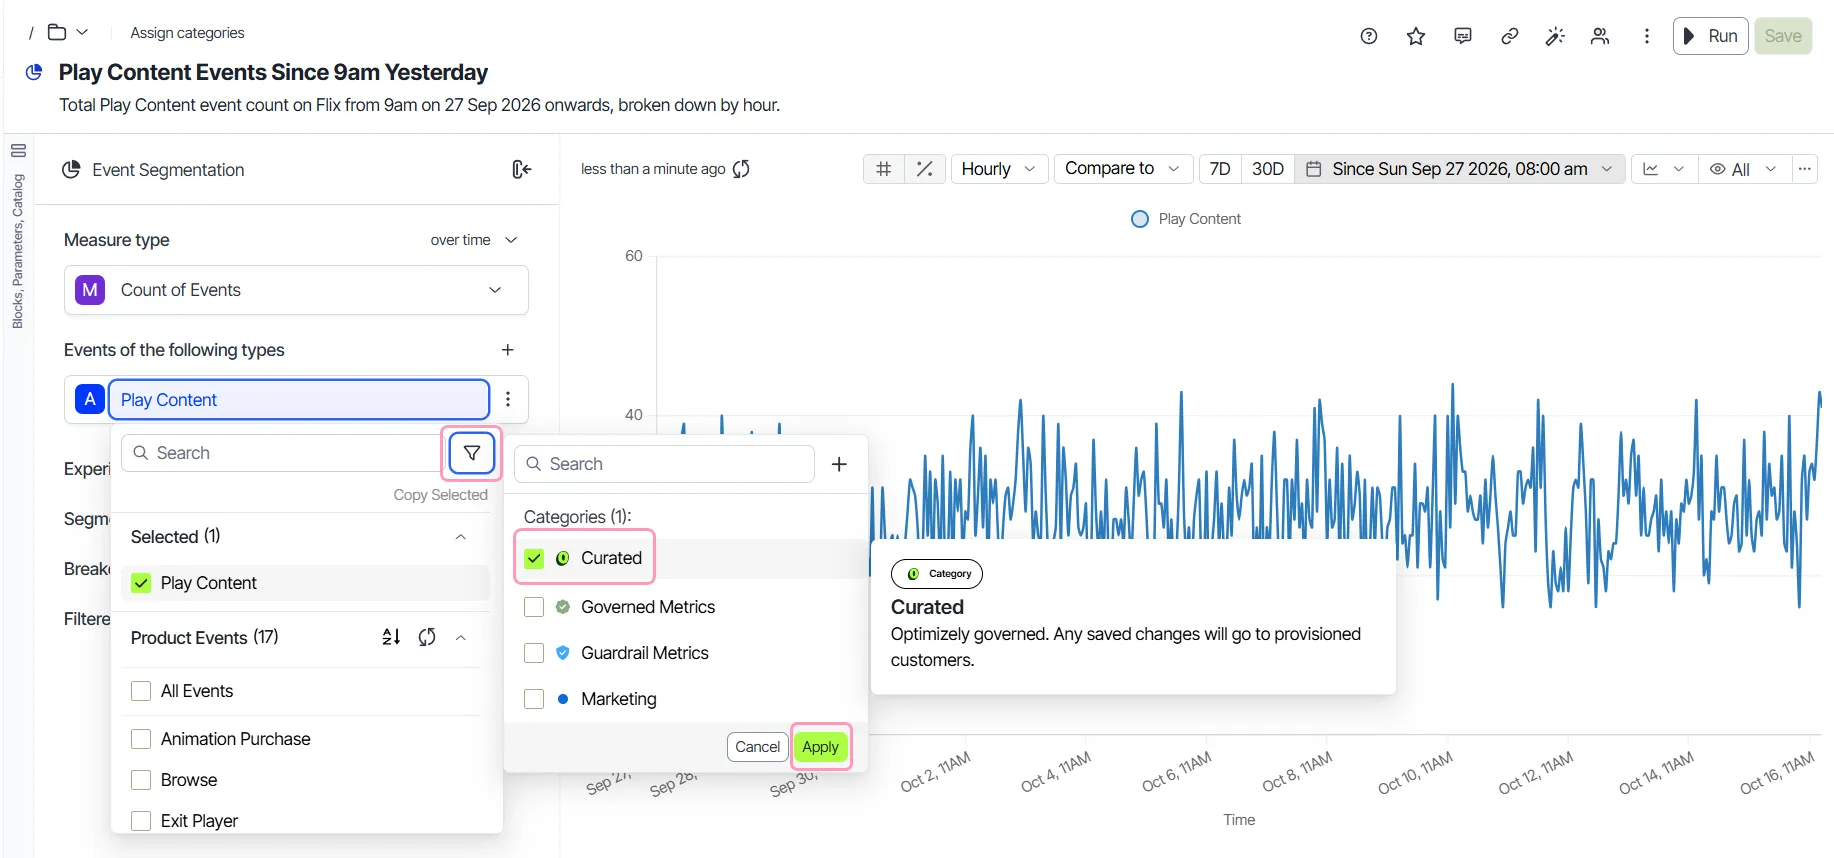
- Use categories to filter data assigned to a category within the terminal select in explorations.
Analyze experiments
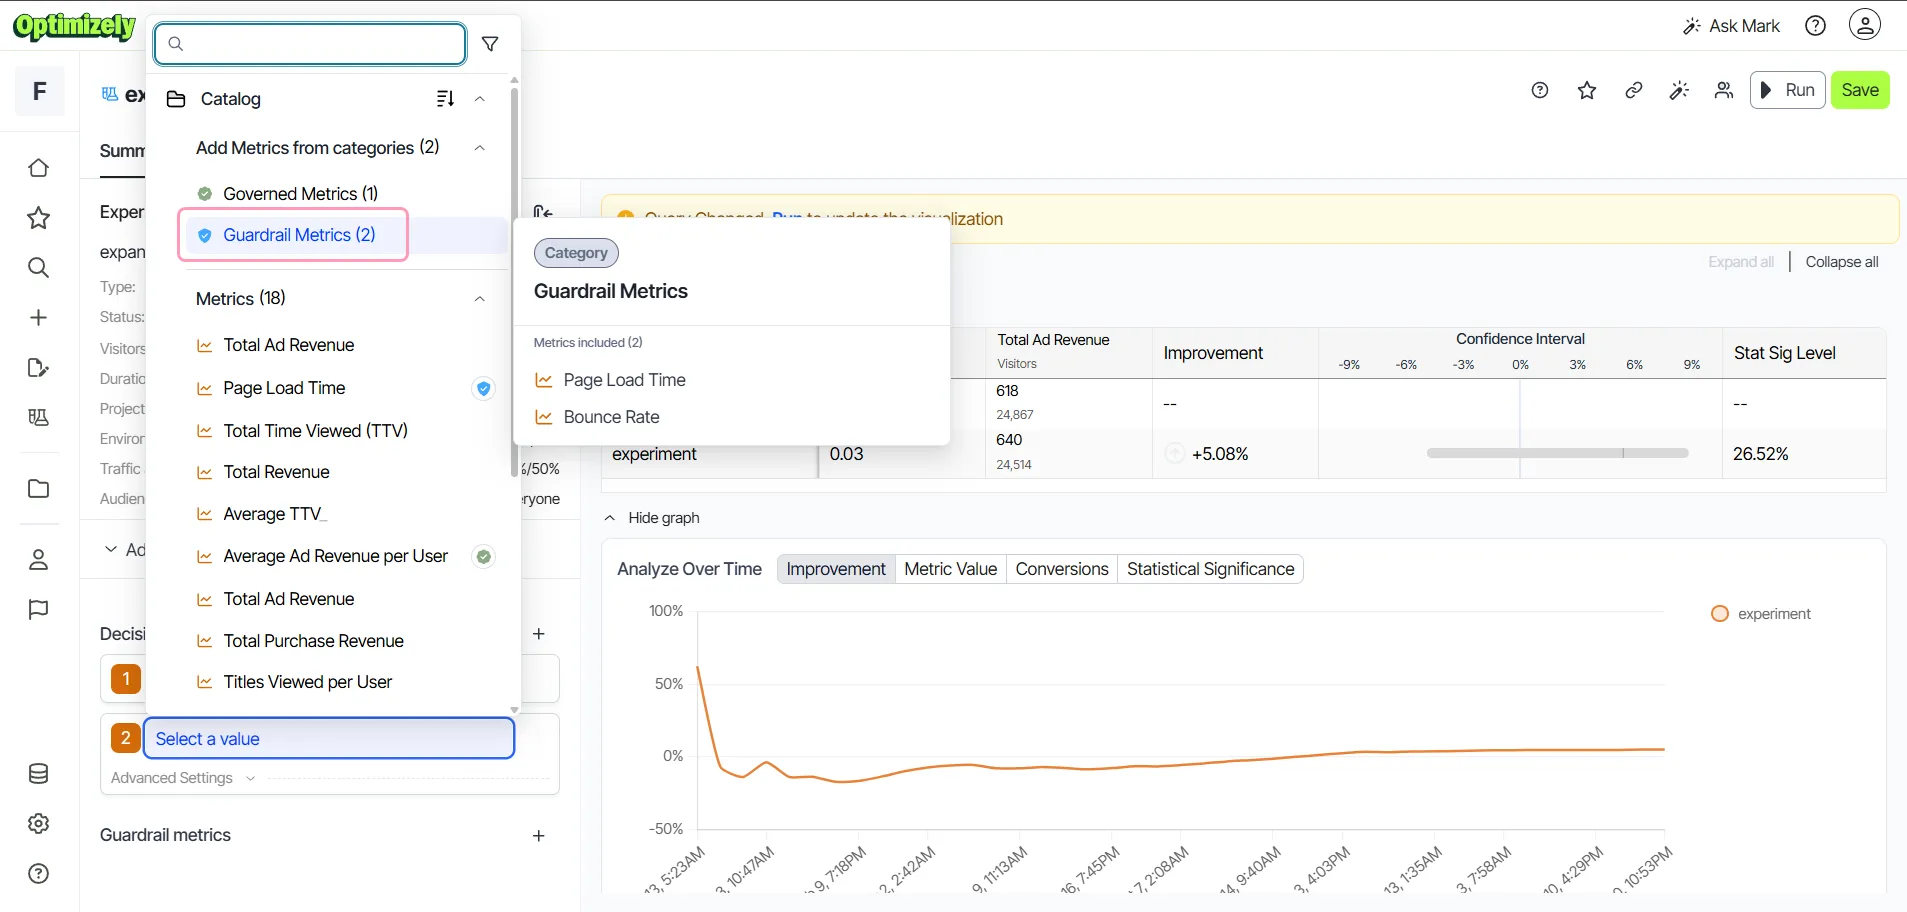
Analyze multiple metrics that share the same category by selecting the category itself. For example, select a category to add all its metrics to an experiment scorecard. You do not have to manually select the same metrics for every experiment.
Configure categories and permissions
Manage categories from the Settings page. Only admins can create categories and control how they are applied across the system. To configure categories:
- Go to Settings > Organization > Categories > + New Category.
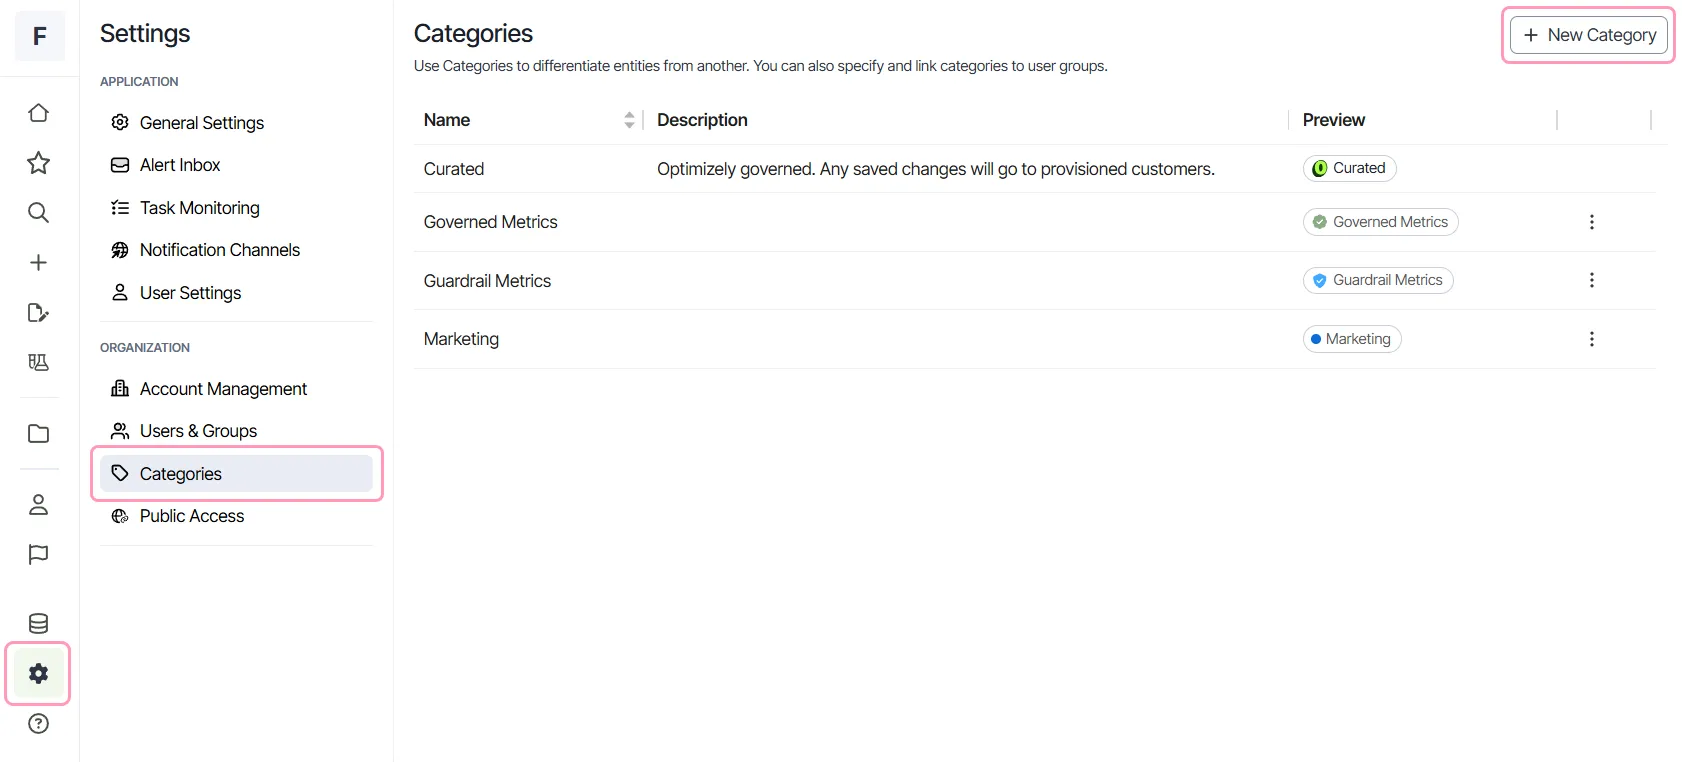
- Enter the following information:
- Name and description – Describe your category (for example, Sales or Trusted Metrics).
- Color and icon – Visually differentiate categories in the UI.
- Permissions – Control which users and groups can manage or apply specific categories.
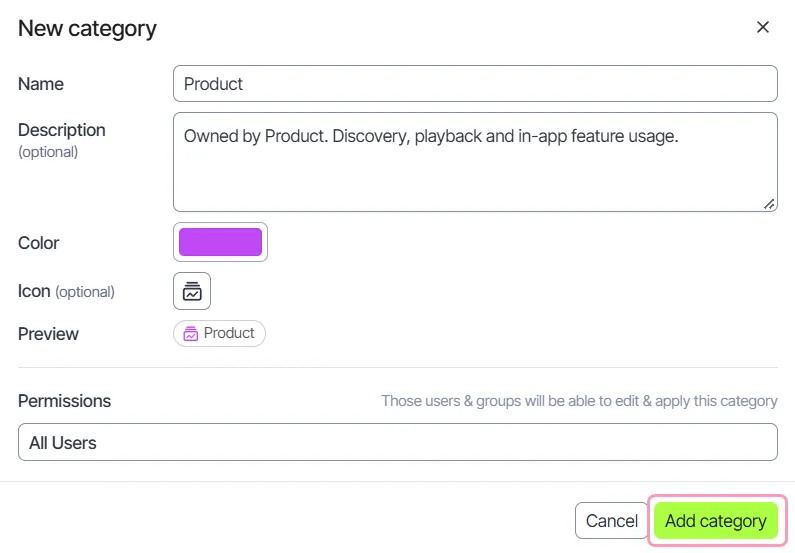
- Click Add category.
Admins can also create categories directly from any list. Analytics adds the category to the list but does not select it. To create and apply a category from a category list, follow these steps:
- Click Assign categories > Add New Category.
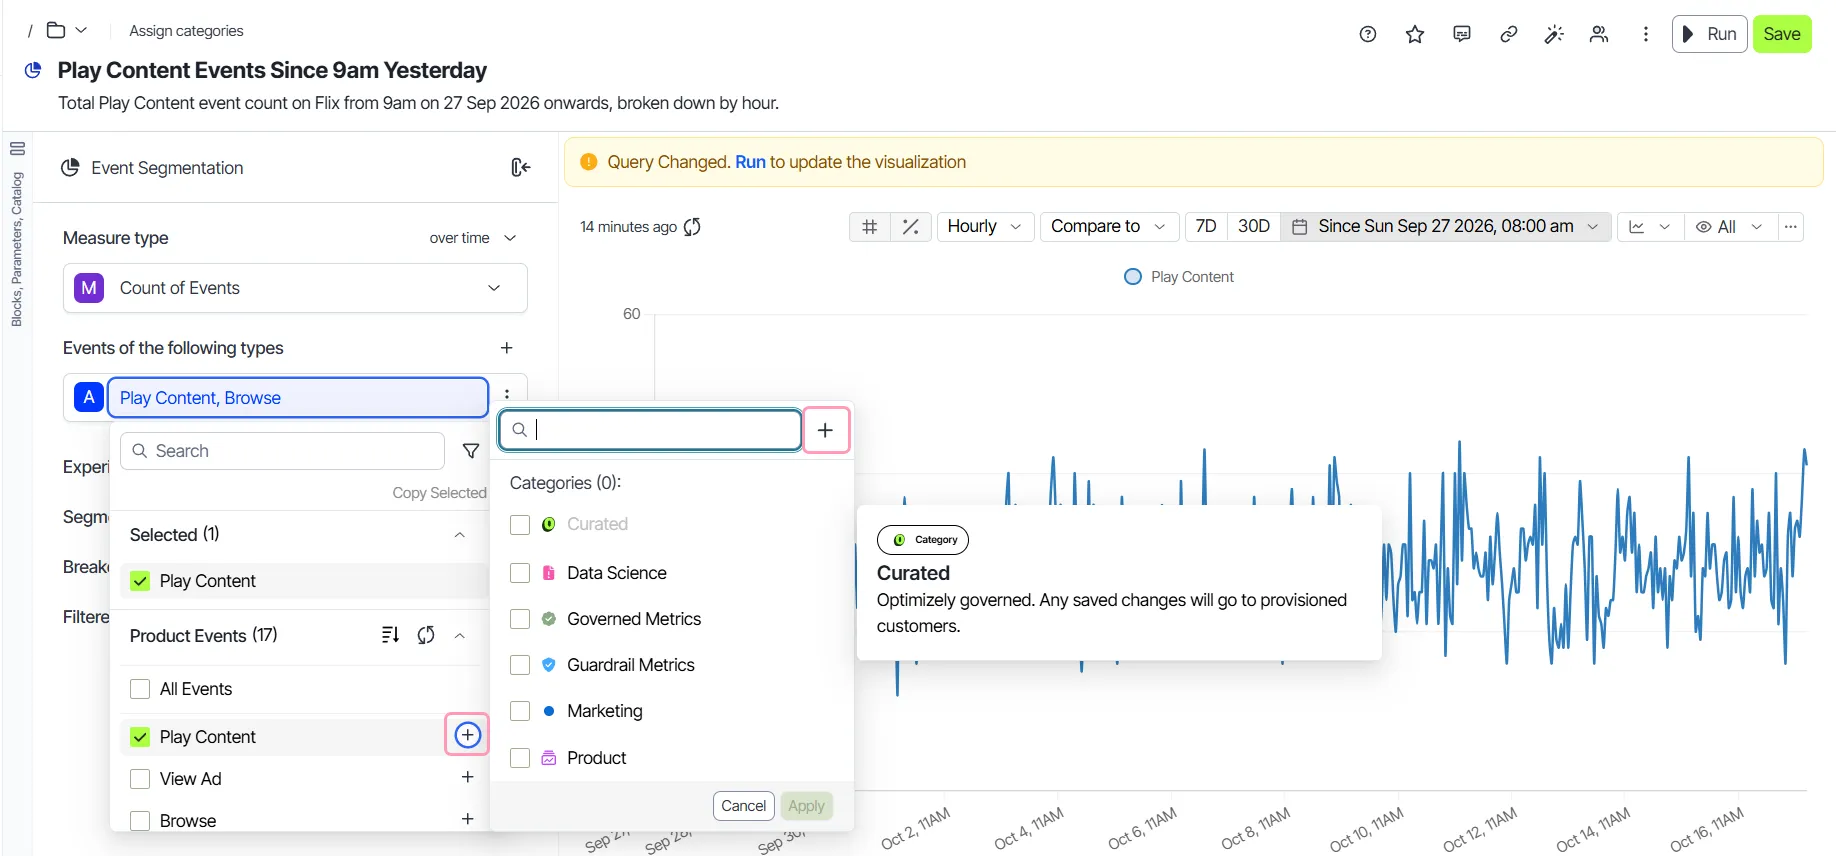
- Enter the category details and click Add category.
- Select the category you created.
- Click Apply.
Assign categories to entities
To assign categories to explorations, metrics, or columns, follow these steps:
- Open the entity of your choice.
- Click Assign categories.
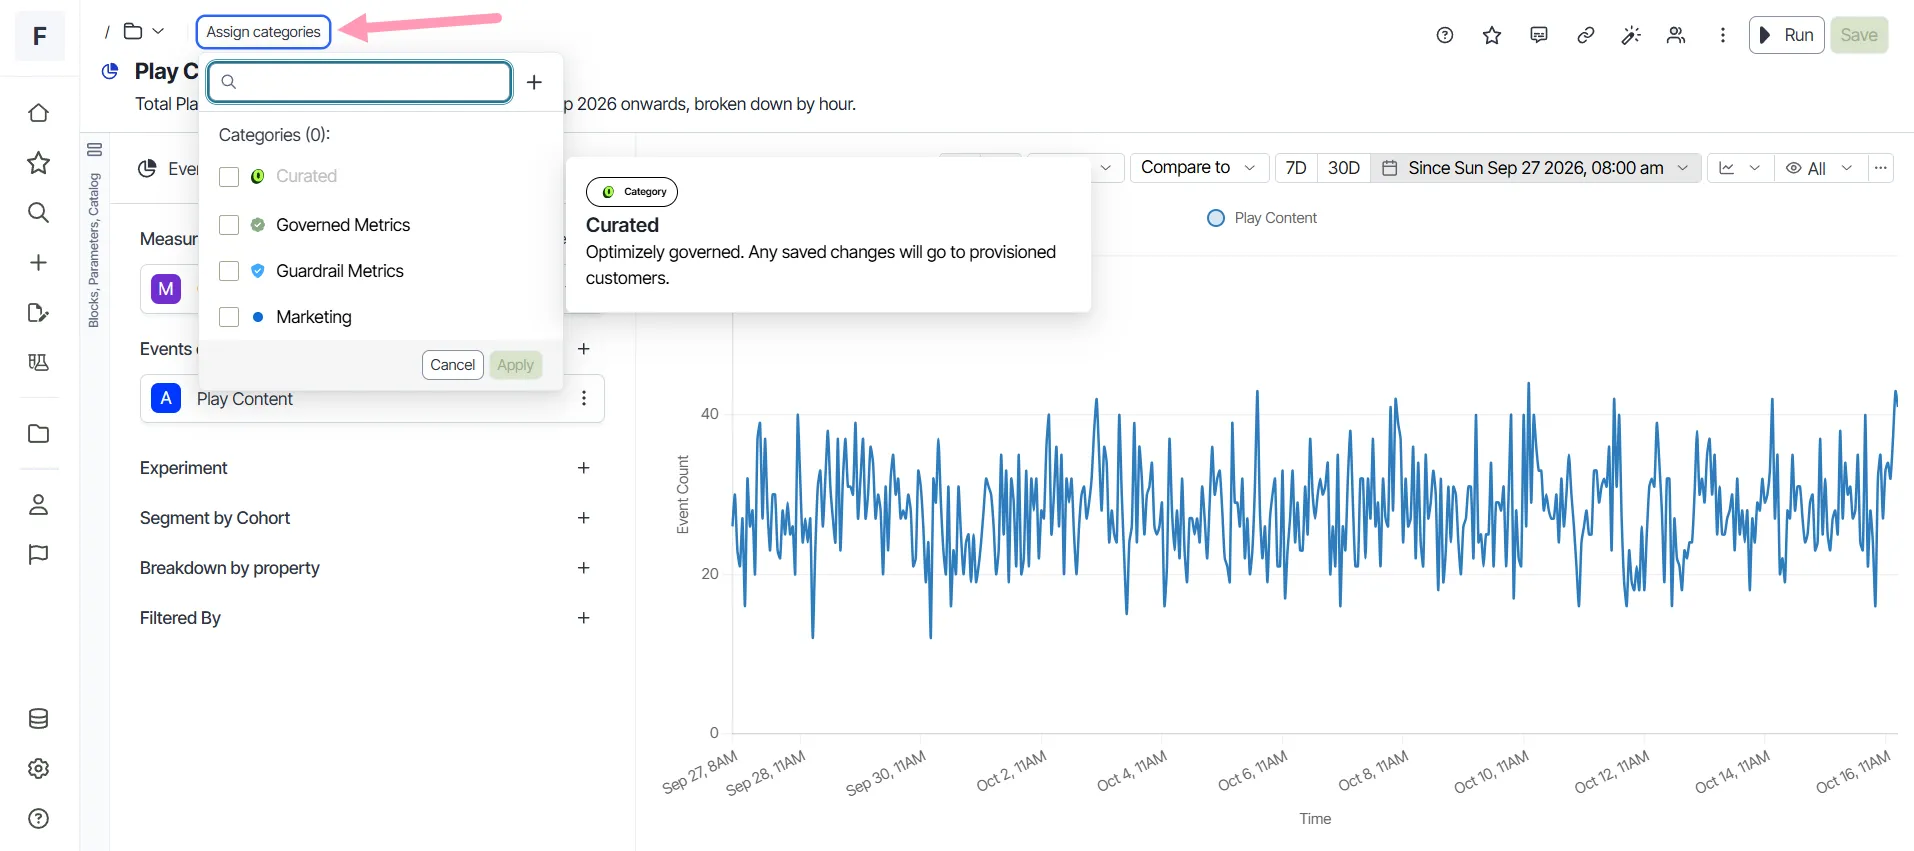
- Select one or more categories. To use a category that does not exist yet, go to Configure categories and permissions.
- Click Apply.
Note
Every category list applies your selection only when you click Apply. Apply is unavailable until you change the selection. To discard your changes, click Cancel or press Esc. If you click outside the list, the list stays open and keeps your changes pending.
Categorize events
Categorize events from the event picker in exploration templates to group related events and find them faster. To categorize an event, follow these steps:
- In the event picker, click Assign categories for the event you want to categorize.
- Select one or more categories.
- Click Apply.
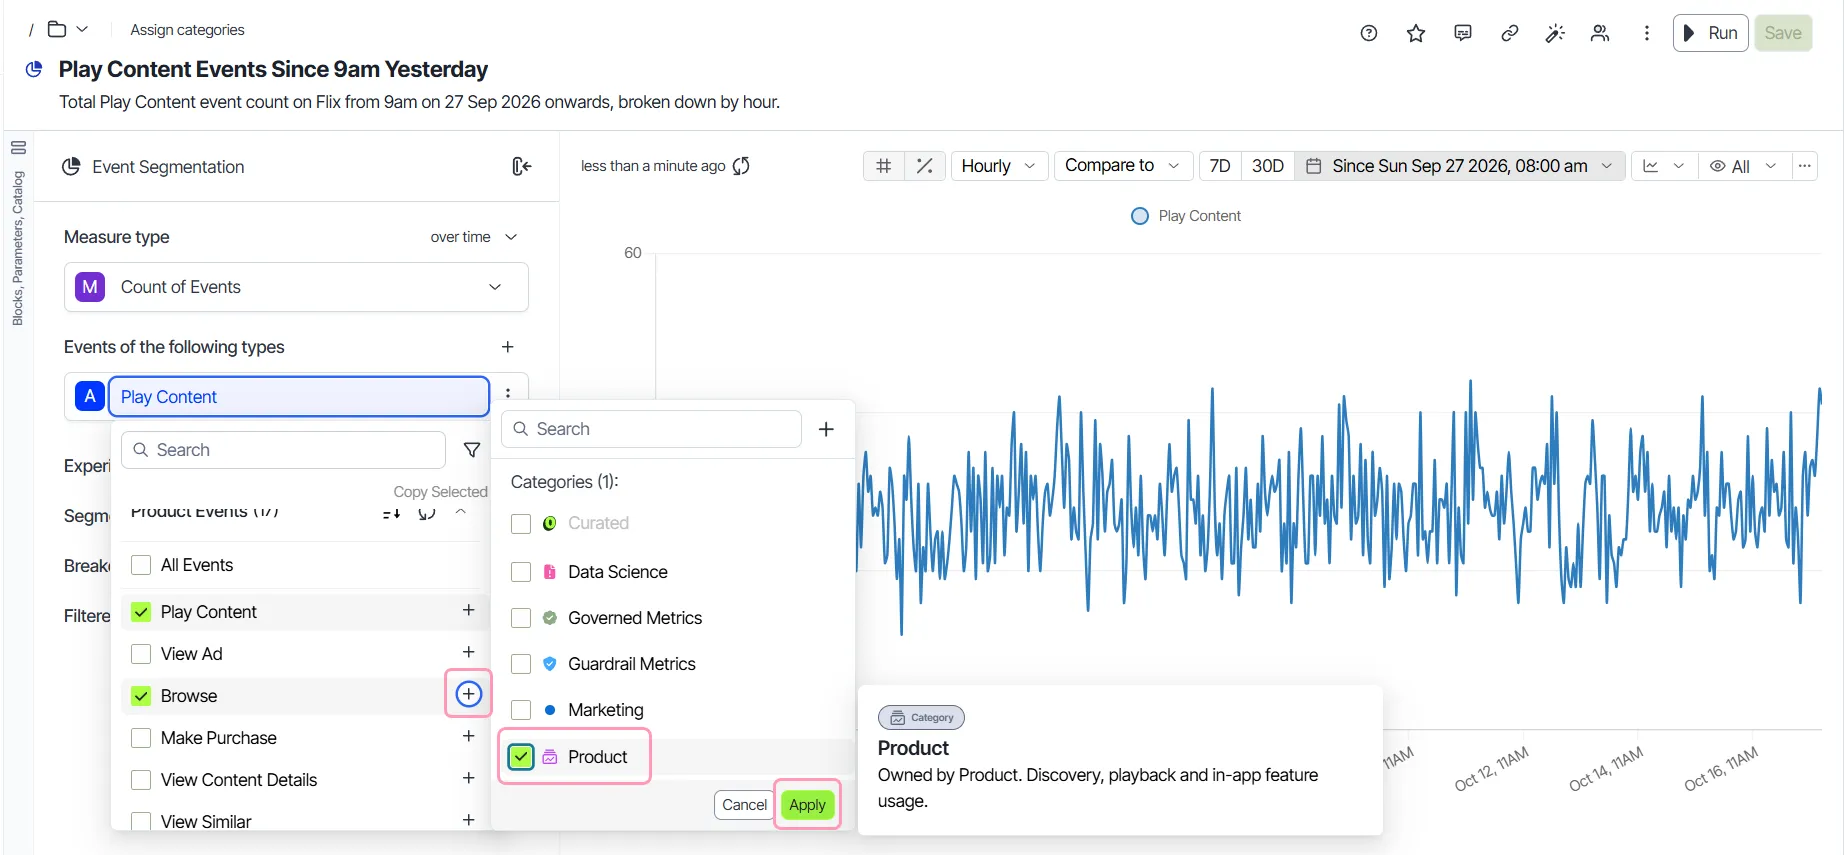
To create a category from the event picker, go to Configure categories and permissions.
Assign categories to events from Data > Events too, in the Categories column. For steps, go to Event taxonomy.
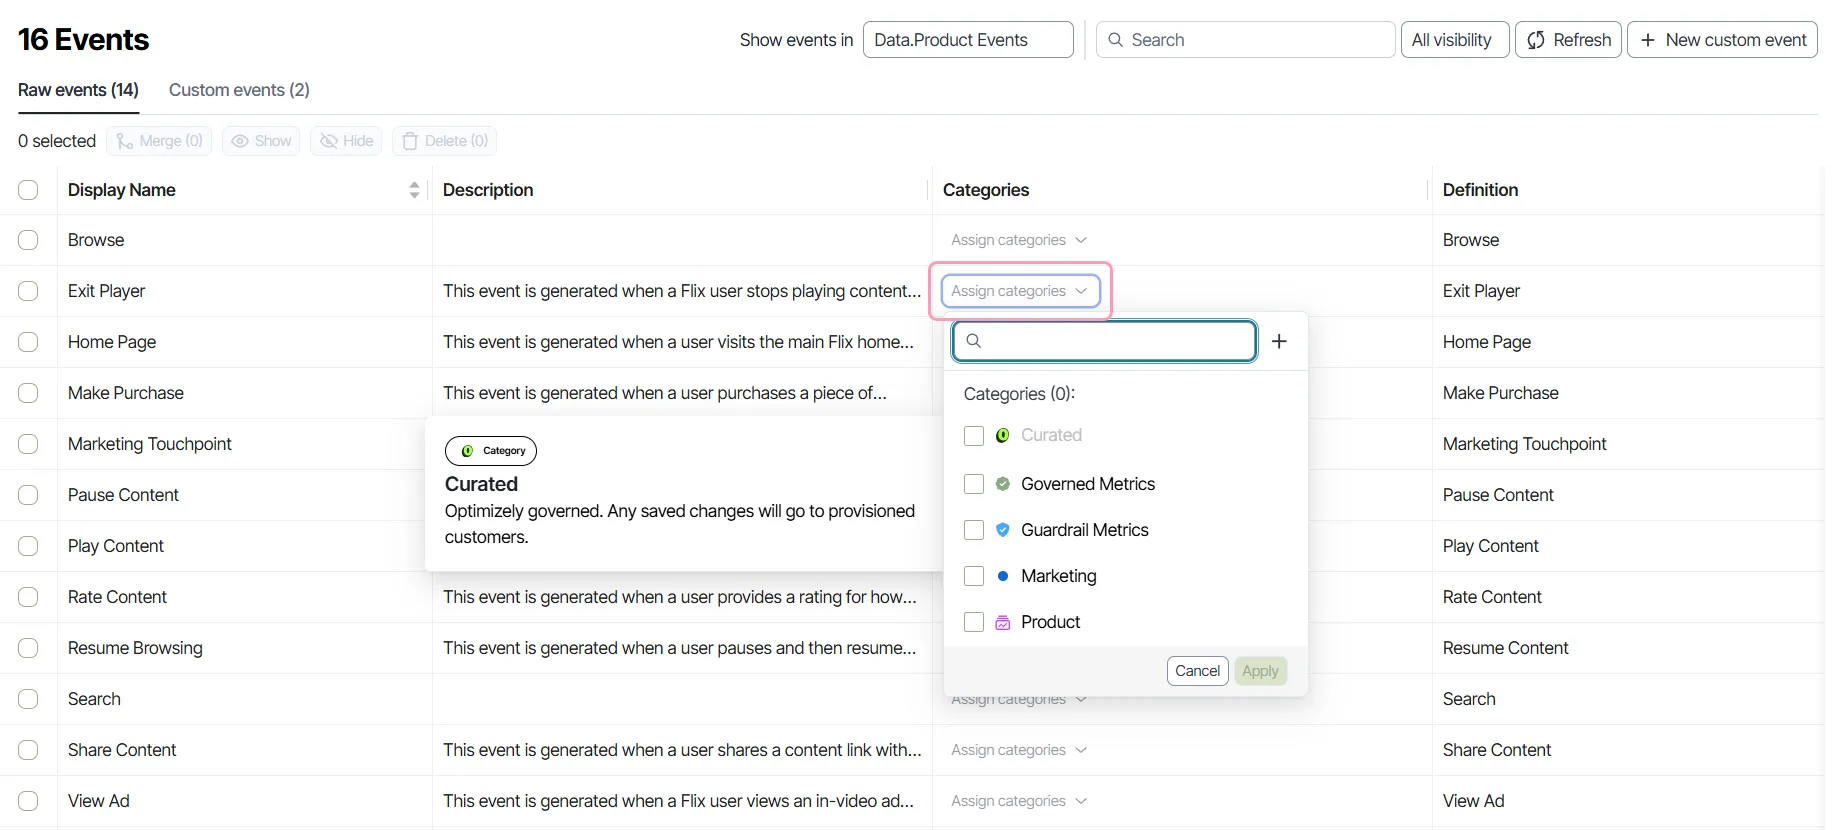
Filters and visibility
When you apply categories, they are visible in the following areas of Optimizely Analytics:
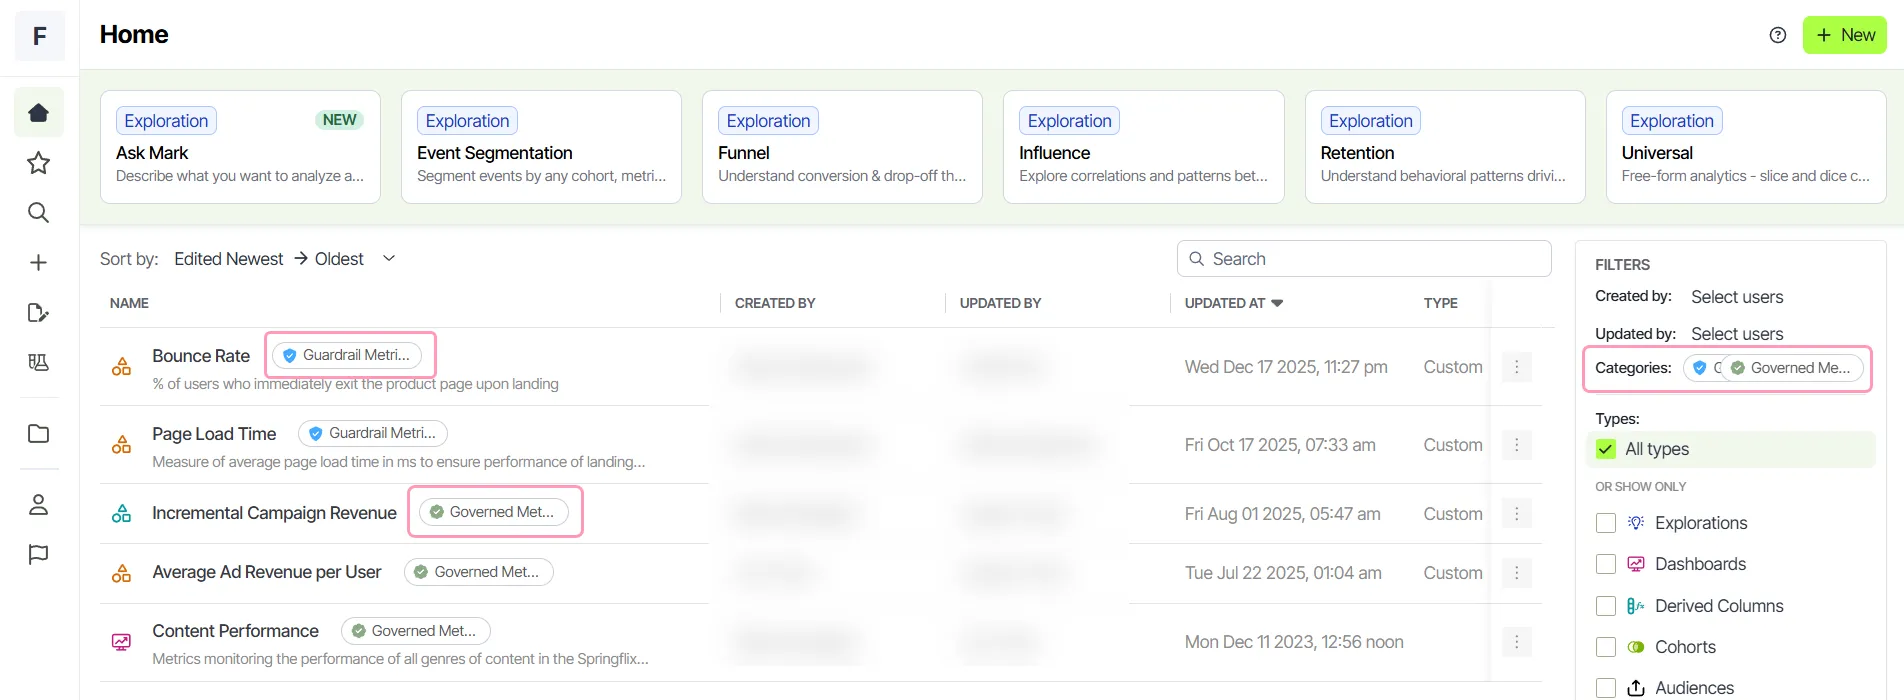
- Home page – Use category filters to find relevant dashboards or explorations.
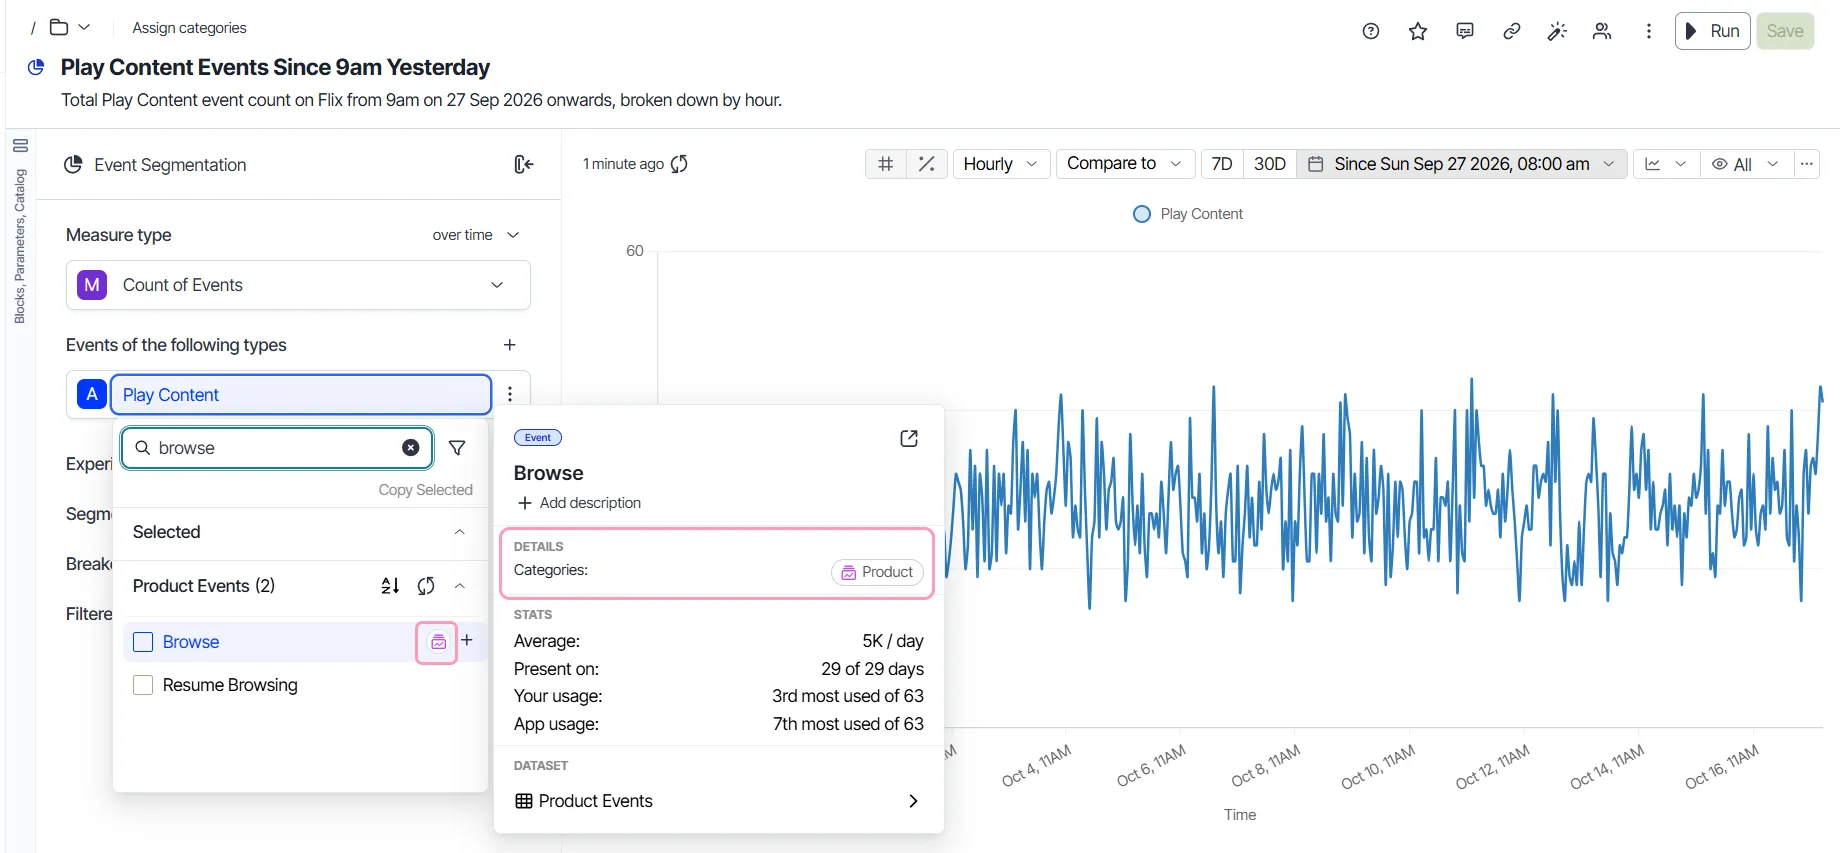
- Search and pickers – Filter by category when selecting events, columns, or metrics.
- Global search – Identify entities by category when you search across Analytics. To open global search, click Search APP_NAME, or press Cmd+K (Mac) or Ctrl+K (Windows). APP_NAME is the name of your current app. Each result displays up to three category tags. When an entity has more than three categories, a count tag shows the number of hidden categories. Hover over the tags to see every category assigned to the entity.