DIBS installation and configuration
📘 Note This content is retired and no longer maintained.
Build a DIBS project
- Download the DIBS payment provider file package, which provides an EPiServer.Business.Commerce.Payment.DIBS project.
- Open the DIBS project and save the solution.
- Install the EPiServer.Commerce.Core NuGet package by executing this command in Package Manager Console: Install-Package EPiServer.Commerce.Core .
📘 Note To avoid assembly conflicts, install the Optimizely Customized Commerce Core version that your site is using. Also, apply no database transforms.
🚧 Important! If you are using Optimizely Customized Commerce 11 or higher, ignore step 4. That code was removed from Optimizely Customized Commerce 11.
- If you are using workflow, uncomment the following line in DIBSPaymentGateway.cs. payment.Properties\["NextAction"\] as Action).Invoke();
- Rebuild the DIBS project. Now you have the file EPiServer.Business.Commerce.Payment.DIBS.dll.
The project package includes these files:
- DIBSPaymentMethod.cs (Optimizely Customized Commerce versions 12 and up) – represents a payment method for DIBS
- DIBSPaymentOption (Optimizely Customized Commerce versions 10.5 and 11) – represents a payment method for DIBS
- DIBSPaymentGateway.cs – mainpayment gateway business
- DIBSPaymentController.cs – the page controller
- RedirectAndPostActionResult.cs, TransactionRequest.cs – helpers for the controller
- XML files in lang folder – language files
- ConfigurePayment.ascx, EditTab.ascx and its ascx.cs, ascx.designer.cs – Commerce Manager payment editor
- PaymentMethod.ascx and its ascx.cs, ascx.designer.cs – front-end webform view
- DIBS.cshtml, DIBSConfirmation.cshtml (Optimizely Customized Commerce 12 versions and up) – front-end mvc view
- DIBSPaymentMethod.cshtml, DIBSConfirmation.cshtml (Optimizely Customized Commerce versions 10.5 and 11) – front-end mvc view
- DIBSConfiguration.cs, DIBSCurrencies.cs, DIBSLanguages.cs, DIBSRequestHelper.cs, Utilities.cs – helper classes
- DIBSPage.cs – page type
- DIBS-logo.jpg logo – in the images folder
Commerce Manager
- Find the Commerce Manager Apps folder, located under the Optimizely Commerce Manager project folder.
- Deploy the ConfigurePayment.ascx file to the Apps\Order\Payments\Plugins\DIBS folder. Create the DIBS folder if it does not exist.
- Deploy the EditTab.ascx file to the Apps\Order\Payments\MetaData\DIBS folder. Create the DIBS folder if it does not exist.
- Deploy EPiServer.Business.Commerce.Payment.DIBS.dll to your Commerce Manager site's bin folder.
Front-end site Webform (Sample site)
- Deploy PaymentMethod.ascx to the website's Templates\Sample\Units\CartCheckout\DIBS folder.
- Deploy DIBS-logo.jpg to the website's styles\images folder.
- Deploy the all files in lang folder to the Commerce Sample site's lang folder.
- Deploy EPiServer.Business.Commerce.Payment.DIBS.dll to the Commerce Sample Site's bin folder.
Front-end site MVC (Quicksilver)
- Deploy DIBS-logo.jpg to your website's styles\images folder.
- Deploy all files in lang folder to the Quicksilver site's \lang folder.
- Deploy EPiServer.Business.Commerce.Payment.DIBS.dll to your Quicksilver site's bin folder.
- Deploy DIBSConfirmation.cshtml and DIBS.cshtml to your website'sViews\Shared folder.
(Optional) The following steps allow the creation of a DIBS under the Checkout page.
- In your solution's front-end site project, add references to the deployed .dll's.
- Open CheckoutPage page type in Features/Checkout/Pages.
- Add DIBSPage type to the AvailableContentTypes attribute. [AvailableContentTypes(Include = new \ { typeof(OrderConfirmationPage), typeof(MultiShipmentPage), typeof(DIBSPage) }, IncludeOn = new \ {typeof(StartPage)})\
- Rebuild the Quicksilver project.
DIBS configuration
Set up the DIBS payment provider in Commerce Manager
After deploying all necessary files, follow these steps.
- Open the Optimizely Customized Commerce Manager back-end site
- Go to Administration > Order System > Payments > English (United States). The last option is the language in which you want to make the PayPal payment available.
- Select Create new payment method.
- For System keyword, select DIBS, the name of the folder created during deployment.
- For Class Name, select EPiServer.Business.Commerce.Payment.DIBS.DIBSPaymentGateway.
- For Payment Class, select Mediachase.Commerce.Orders.OtherPayment.
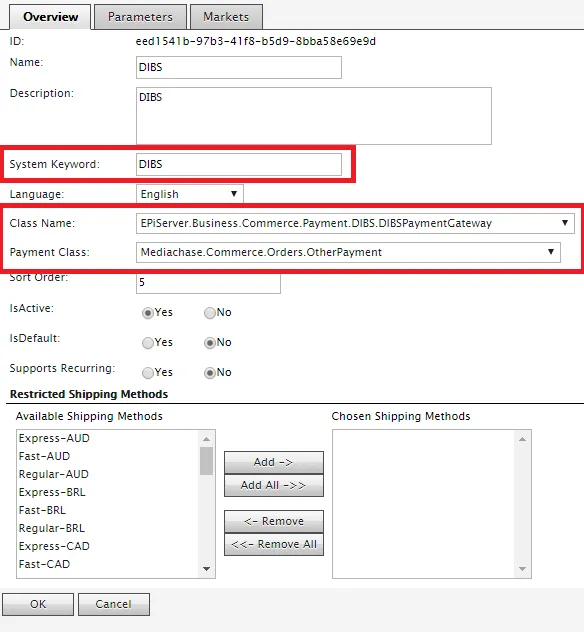
- Click OK to save DIBS payment method.
- Open the DIBS payment method for editing.
- Click the Parameters tab and enter the following:
- API UserId – The user for the DIBS administration page.
- Merchant Password – To let customers view, you need only the API UserId. But to be able to complete and return an order, you also must add a valid Merchant Password.
- Processing Url – The URL to process a DIBS payment, usually https://payment.architrade.com/paymentweb/start.action.
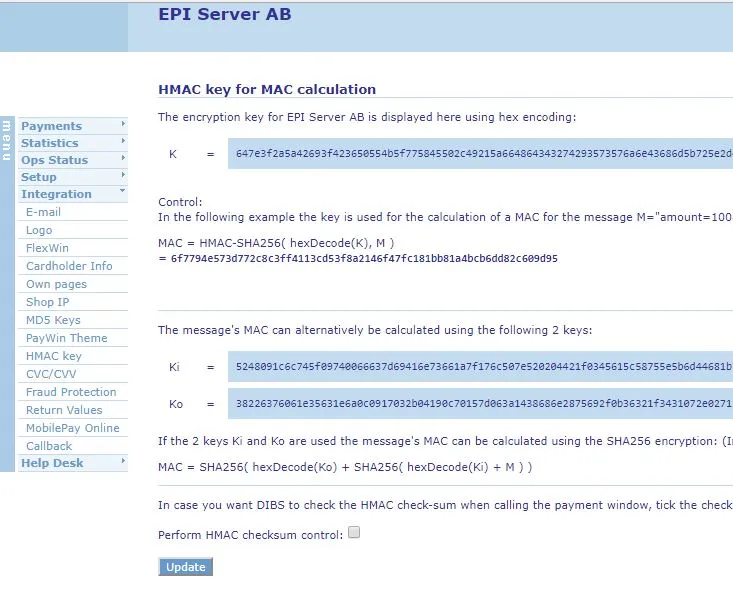
- HMAC key – Use HMAC key to secure data sent between your system and DIBS.
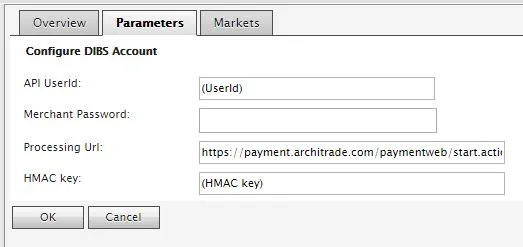
- The key values are available from the DIBS Administration interface (Integration > HMAC key > K value):
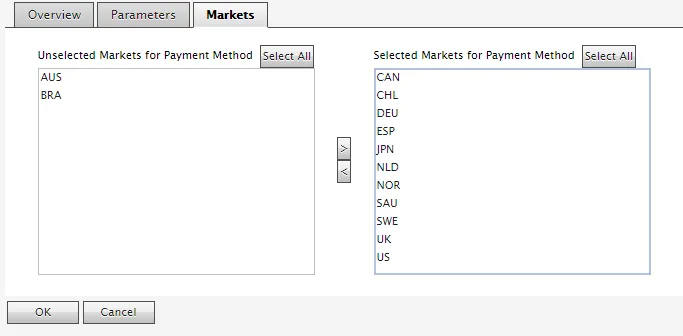
- Click the Markets tab and add the expected markets for this payment.
Setup DIBS payment provider in front-end site
To set up a DIBS payment provider, browse to the front-end site and follow these steps.
- Go to CMS > Admin > Content Type tab.
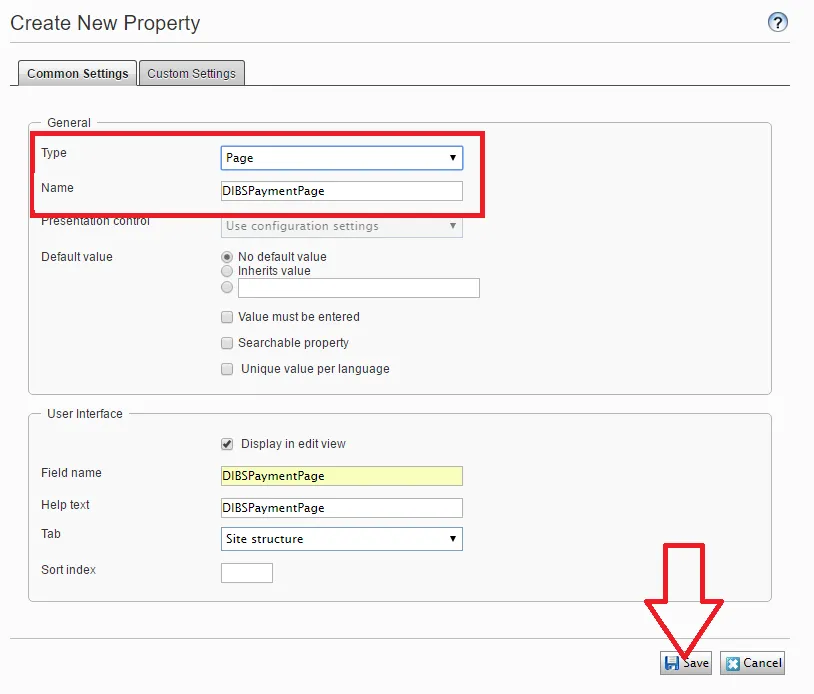
- Add two properties, DIBSPaymentPage and DIBSPaymentLandingPage of the type Page, to the Start page (or Home page) page type.
- Go to CMS > Edit.
- Create a Page using DIBS Payment Page under the Checkout page, then publish it.

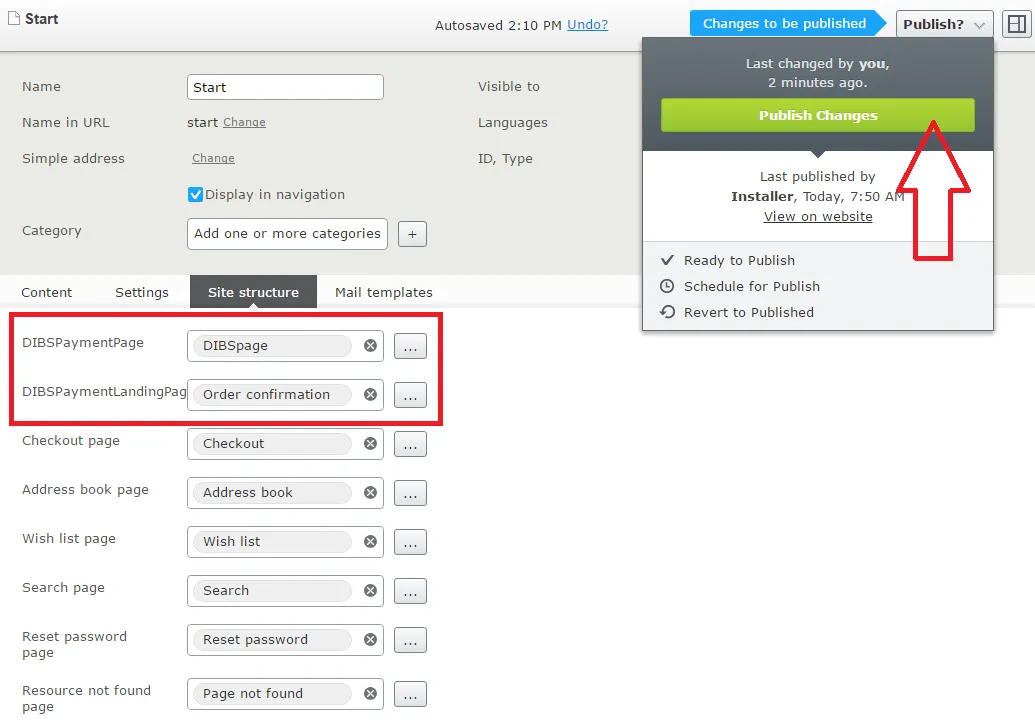
- Open the site's home page, click the Site Structure tab, and define two new properties.
- Set DIBSPaymentPage property to the DIBS page that was just created.
- Set DIBSPaymentLandingPage property to the Order confirmation page.
DIBS user experience
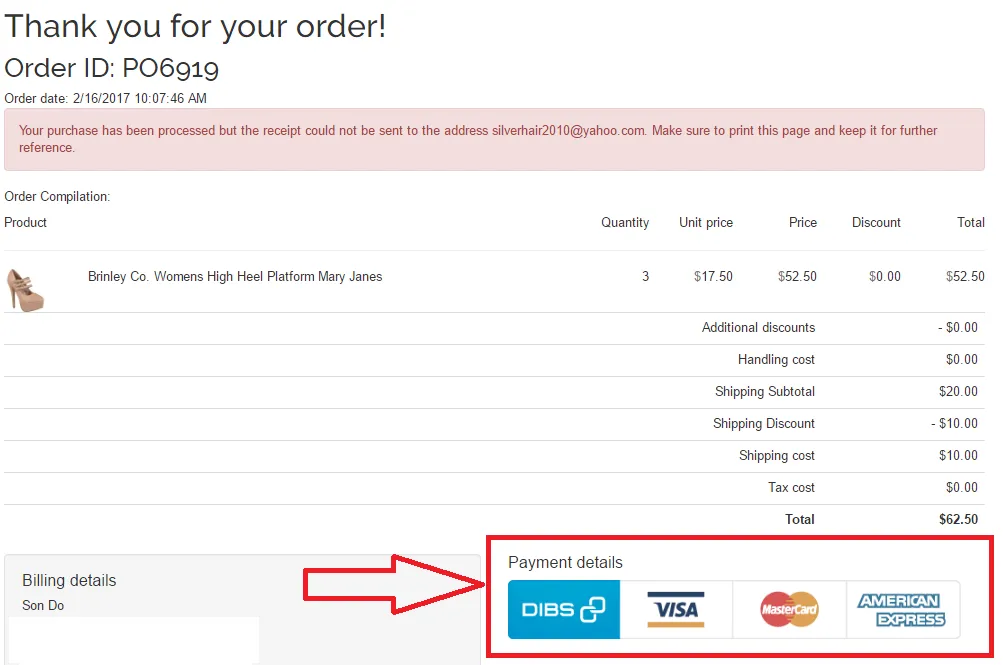
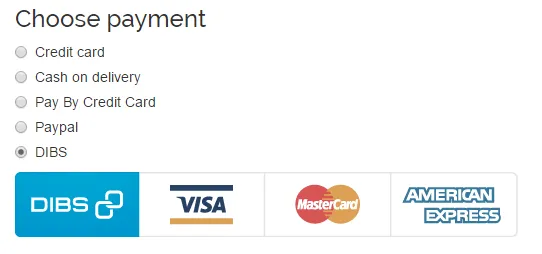
After you deploy the files and configure the DIBS payment module on your Optimizely Customized Commerce website, a DIBS option should appear on your checkout page. This section explains how a user interacts with DIBS.
- During checkout, on the checkout page, select DIBS as the payment method.
- When you click Place order, you are redirected to DIBS to verify the payment.
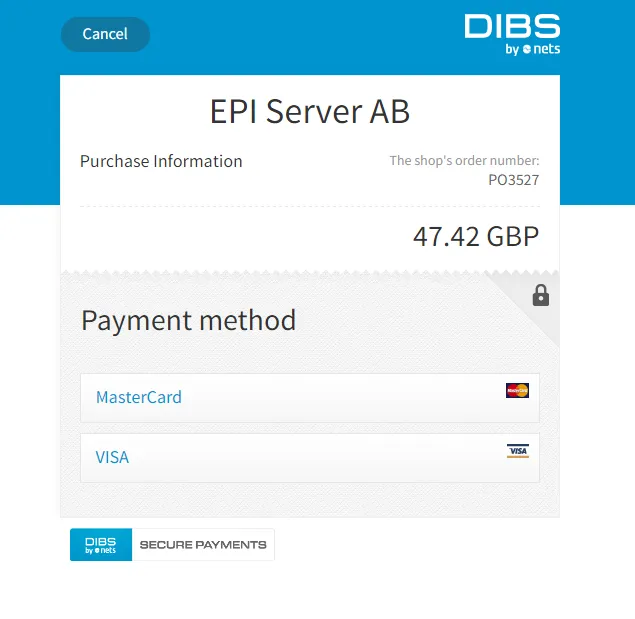
- When you finalize the approval process, you are redirected to the Order confirmation page (previously configured).