Connect your Snowflake warehouse with an external identity provider
Connect Optimizely Analytics to Snowflake through your company's identity provider (IdP), such as Okta. Each user logs in to Snowflake with their company credentials and single sign-on (SSO) policies. Queries then run with that user's own Snowflake roles, so your Snowflake access controls apply in Optimizely Analytics.
Your IdP issues the Open Authorization (OAuth) tokens, and Snowflake trusts them through an External OAuth security integration. Optimizely Analytics calls this option External IdP. The Internal IdP option uses Snowflake's own OAuth server instead. For the Internal IdP setup, see Connect your Snowflake warehouse with OAuth.
Choose External IdP in the following cases:
- Central login policies – Your company manages Snowflake access in an IdP. Snowflake logins from Optimizely Analytics then follow the same multifactor authentication and session rules.
- Secondary roles – Users need data that their secondary Snowflake roles grant, not only their primary role.
This article covers logins to your Snowflake warehouse. To configure how users log in to Optimizely Analytics itself, see User authentication.
The configuration consists of the following three parts:
- An IdP administrator registers Optimizely Analytics as an OAuth application in the IdP.
- A Snowflake administrator creates an External OAuth security integration that trusts tokens from the IdP.
- You add the IdP details to a Snowflake connection in Optimizely Analytics, and each user logs in.
Prerequisites
Confirm the following before you start so that each user logs in on the first attempt:
- An IdP administrator who can register an OAuth application and configure its authorization server.
- A Snowflake administrator with the ACCOUNTADMIN role or a role with the CREATE INTEGRATION privilege.
- The URL of your Snowflake account, such as jdbc:snowflake://ACCOUNT_IDENTIFIER.snowflakecomputing.com. See Account identifiers in the Snowflake documentation.
- A Snowflake warehouse and a writable schema for Optimizely Analytics. To create them, see Configure your Snowflake warehouse. OAuth replaces the shared user and password from that article, so skip them.
- A Snowflake user for each person who queries Snowflake in Optimizely Analytics. Each Snowflake user maps to that person's IdP account.
- Permission to create or edit connections in Optimizely Analytics. See Authorization and access control.
Register Optimizely Analytics in your IdP
Register Optimizely Analytics as an OAuth application so that your IdP issues Snowflake tokens to your users. The registration provides a client ID and client secret, the credentials that identify Optimizely Analytics to the IdP.
Ask your IdP administrator to create the application with the following settings:
- Application type – An application that uses the authorization code flow and has a client secret.
- Grant types – Authorization code and refresh token. Optimizely Analytics uses the refresh token to keep each user logged in without repeated prompts.
- Redirect URL – https://ANALYTICS_DOMAIN/oauth/callback, where ANALYTICS_DOMAIN is the domain you use to open Optimizely Analytics. Example values include https://analytics.optimizely.com/oauth/callback and https://app.netspring.io/oauth/callback. The IdP returns users to this address after they log in.
- Scopes – openid, offline_access, and session:role-any. Optimizely Analytics requests these scopes unless you set others in Scope. The session:role-any scope lets Snowflake use each user's default role.
- Audience – The audience value that the Snowflake security integration expects, typically your Snowflake account URL.
Get the following values from your IdP administrator:
- Client ID and Client Secret – The credentials of the application.
- Token URL – The IdP endpoint that issues tokens. In Okta, this URL typically ends in /v1/token.
- Authorization URL – The IdP endpoint where users log in. In Okta, this URL typically ends in /v1/authorize.
Each URL must use Hypertext Transfer Protocol Secure (HTTPS) and a public host. For Okta, see Configure Okta for External OAuth in the Snowflake documentation. For Microsoft Entra ID, see Configure Microsoft Entra ID for External OAuth.
Create an External OAuth security integration in Snowflake
Create an External OAuth security integration so that Snowflake accepts the tokens your IdP issues. The integration tells Snowflake which IdP to trust and how to match each token to a Snowflake user.
Ask your Snowflake administrator to run CREATE SECURITY INTEGRATION with TYPE = EXTERNAL_OAUTH. For the parameters, see External OAuth overview in the Snowflake documentation. The integration requires the following settings for Optimizely Analytics:
- EXTERNAL_OAUTH_ISSUER and EXTERNAL_OAUTH_JWS_KEYS_URL – The issuer and signing-key endpoint of the authorization server in your IdP.
- EXTERNAL_OAUTH_AUDIENCE_LIST – The same audience value that your IdP application uses.
- EXTERNAL_OAUTH_TOKEN_USER_MAPPING_CLAIM and EXTERNAL_OAUTH_SNOWFLAKE_USER_MAPPING_ATTRIBUTE – The token claim and Snowflake user attribute that match each IdP account to a Snowflake user.
- EXTERNAL_OAUTH_ANY_ROLE_MODE – ENABLE. Snowflake requires this value for the session:role-any scope and for secondary roles.
By default, Snowflake blocks the ACCOUNTADMIN, SECURITYADMIN, ORGADMIN, and GLOBALORGADMIN roles from External OAuth logins. Give each user a default role that the security integration allows.
Configure the Snowflake connection
Add your IdP details to a Snowflake connection so that users log in to Snowflake through your IdP. The following steps apply whether you create a Snowflake connection or edit an existing one.
- Go to Data > Connections.
- Create a Snowflake connection, or open an existing Snowflake connection.
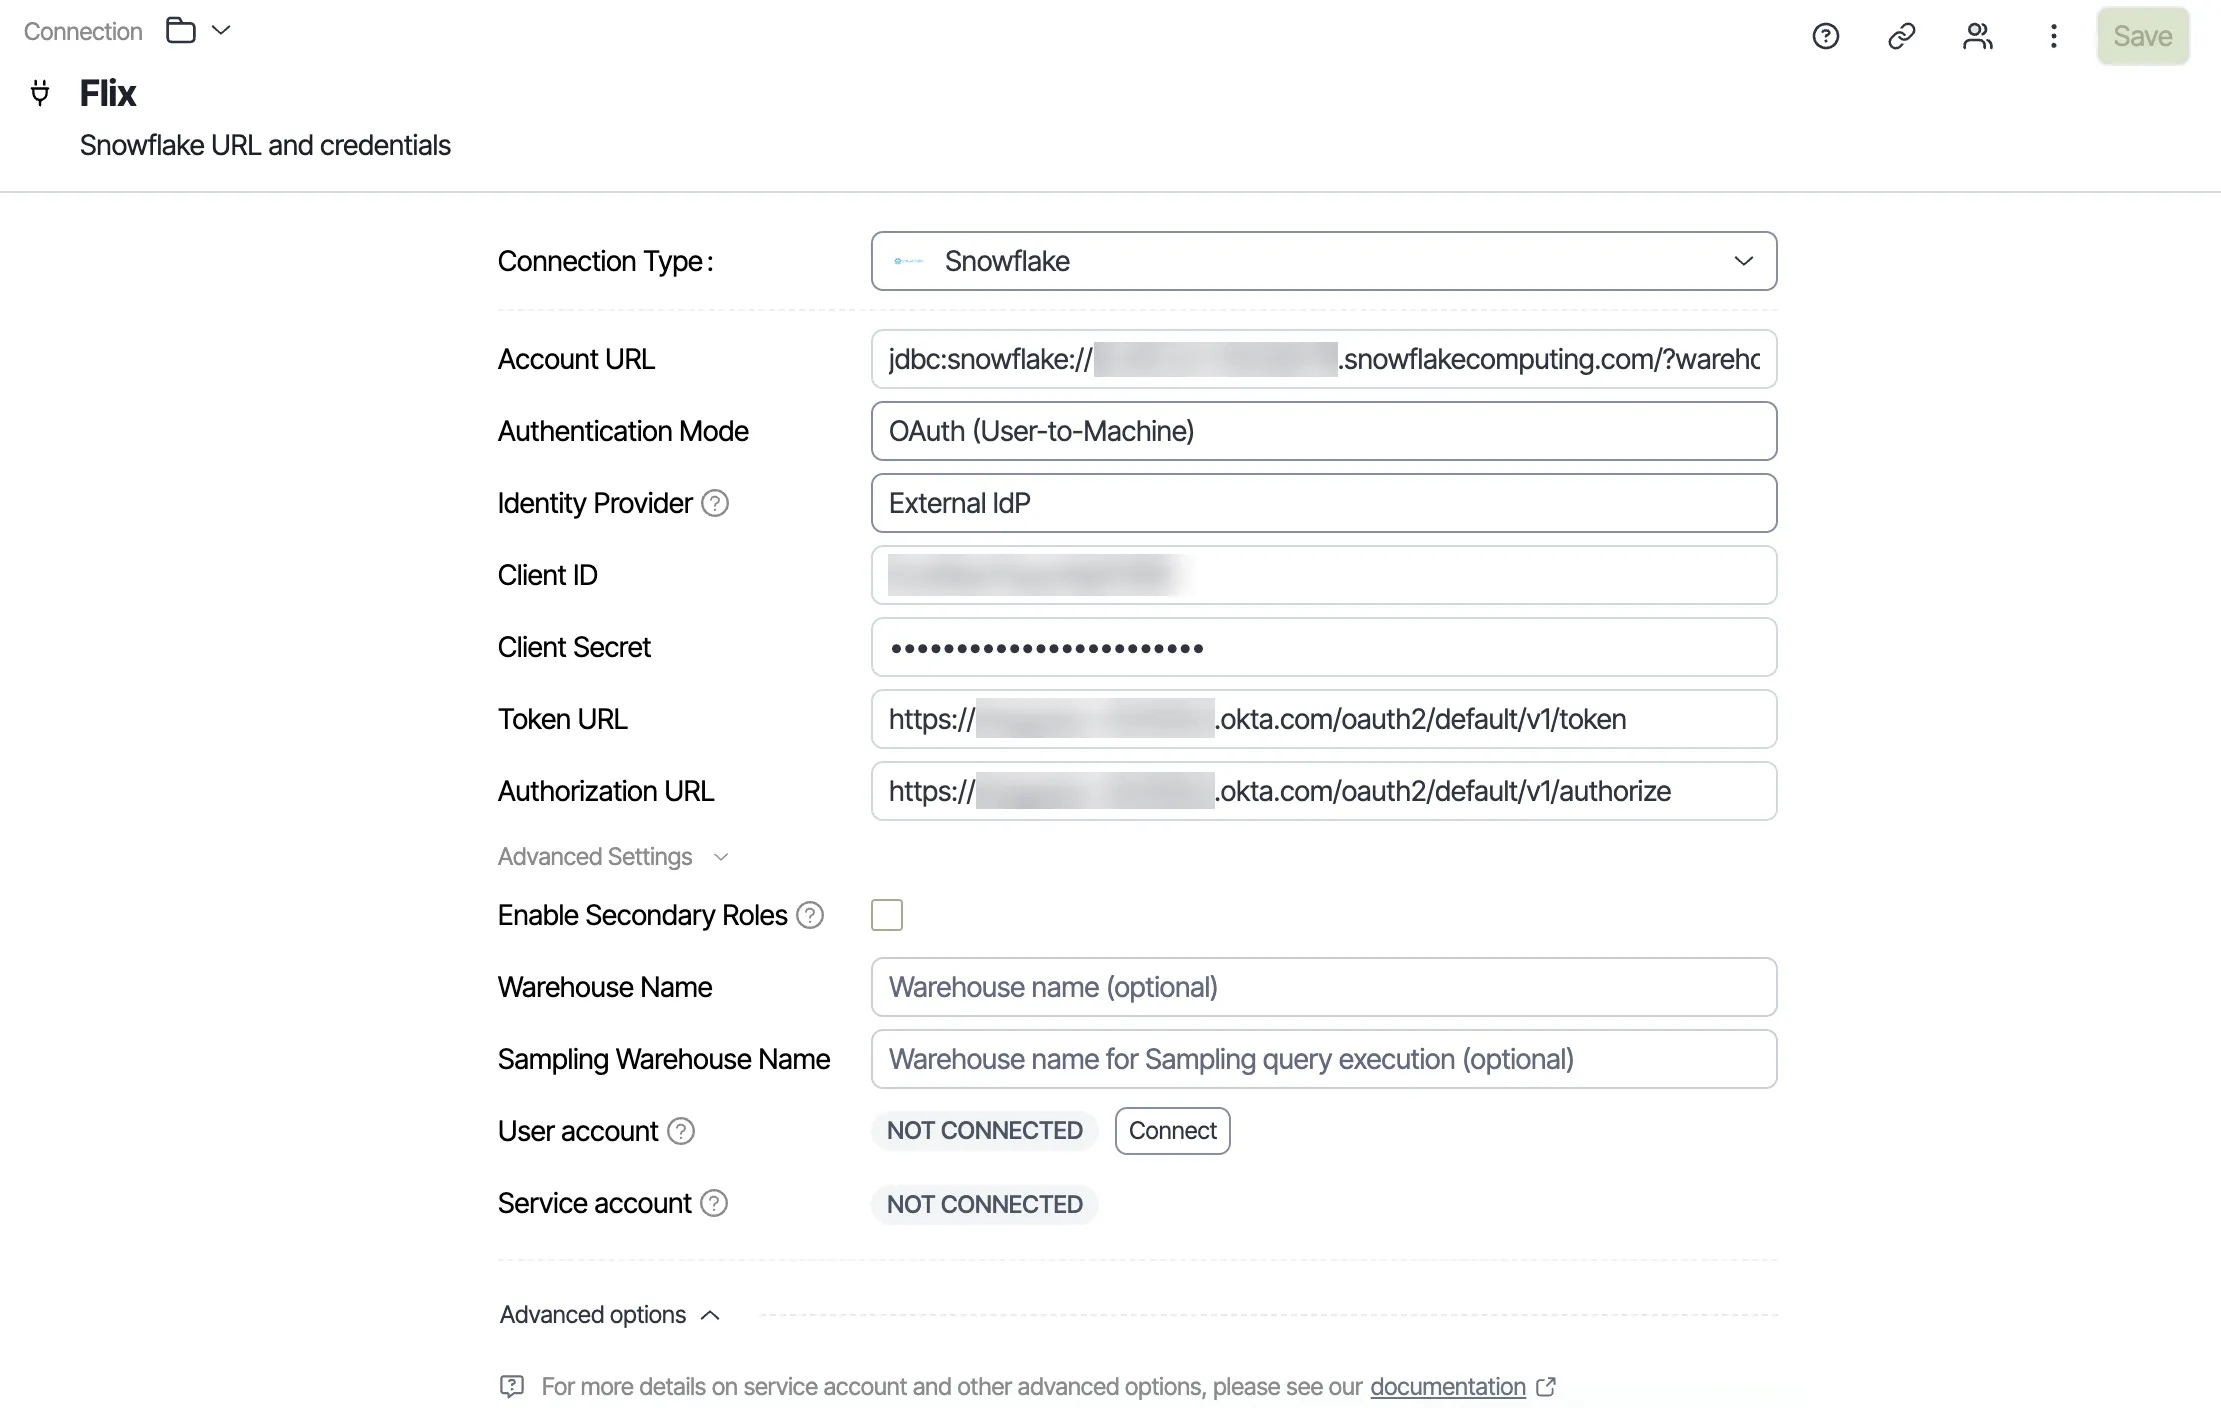
- Enter the URL of your Snowflake account in Account URL.
- Select OAuth (User-to-Machine) from the Authentication Mode drop-down list. The form hides Username, because each user logs in as their own Snowflake user.
- Select External IdP from the Identity Provider drop-down list.
- Enter the Client ID, Client Secret, Token URL, and Authorization URL values from your IdP administrator.
- (Optional) Enter warehouse names in Warehouse Name and Sampling Warehouse Name.
- Click Save.
To let users query through their secondary Snowflake roles, see Access data through secondary roles.
Changing any IdP setting or the account URL later logs out every user on the Snowflake connection. This rule covers the identity provider, client ID, client secret, token URL, authorization URL, and every Advanced Settings field. Each user then logs in again. Enable Secondary Roles is the exception, because it does not change the OAuth tokens.
Log in to Snowflake through your IdP
Log in to Snowflake from the Snowflake connection so that your queries run with your own Snowflake roles. Each user, including the administrator who configures the connection, logs in once for each Snowflake connection.
To log in, complete the following steps:
- Open the Snowflake connection.
- Click Connect.
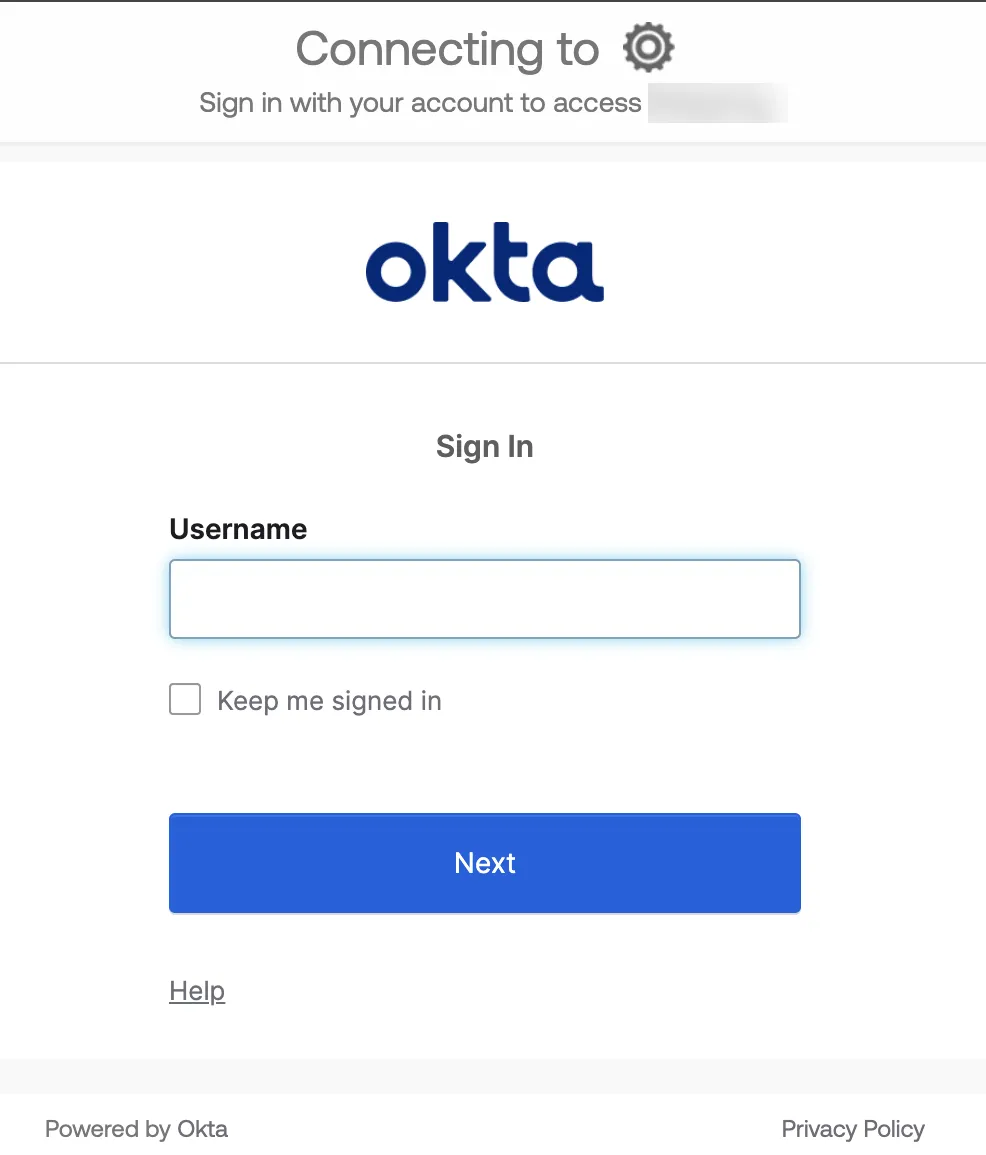
- Complete the IdP login in the pop-up window.
When the login completes, the User account status changes to CONNECTED. To test the connection, click Click to test connection health.
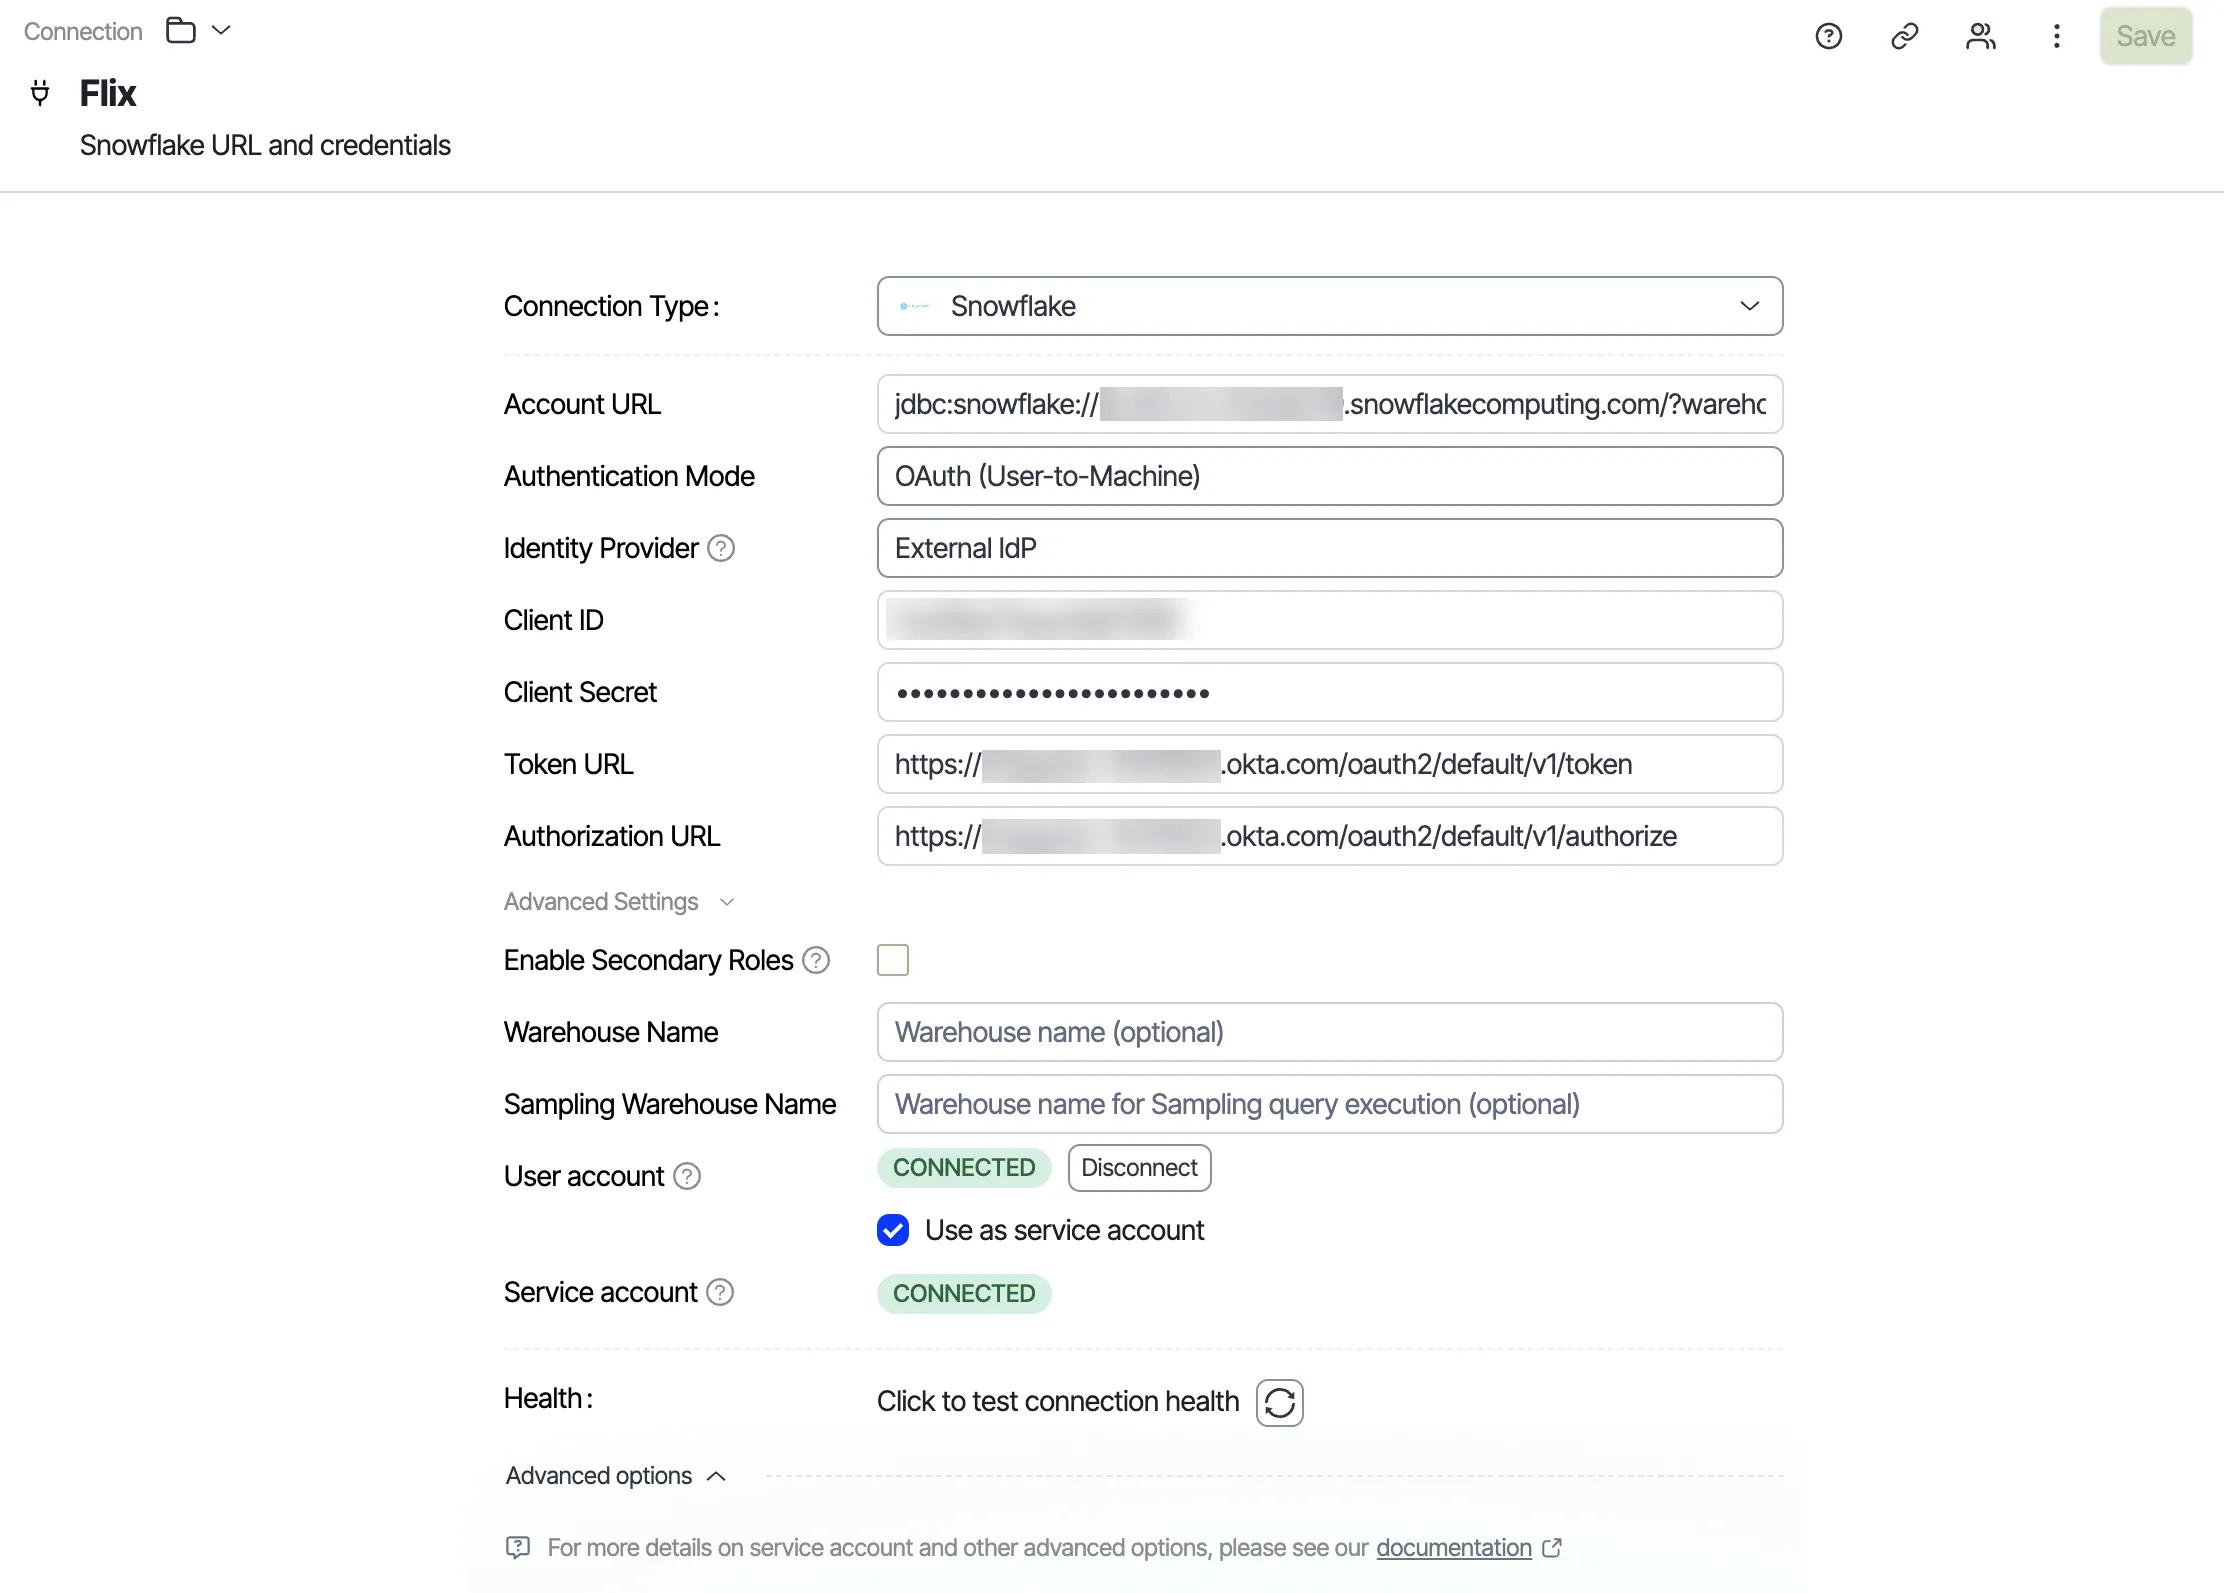
External IdP logins share the rest of their behavior with Internal IdP logins. That behavior covers the service account for scheduled jobs, login statuses, and disconnecting. For those tasks, see Set a service account for scheduled jobs.
Adjust the OAuth requests in advanced settings
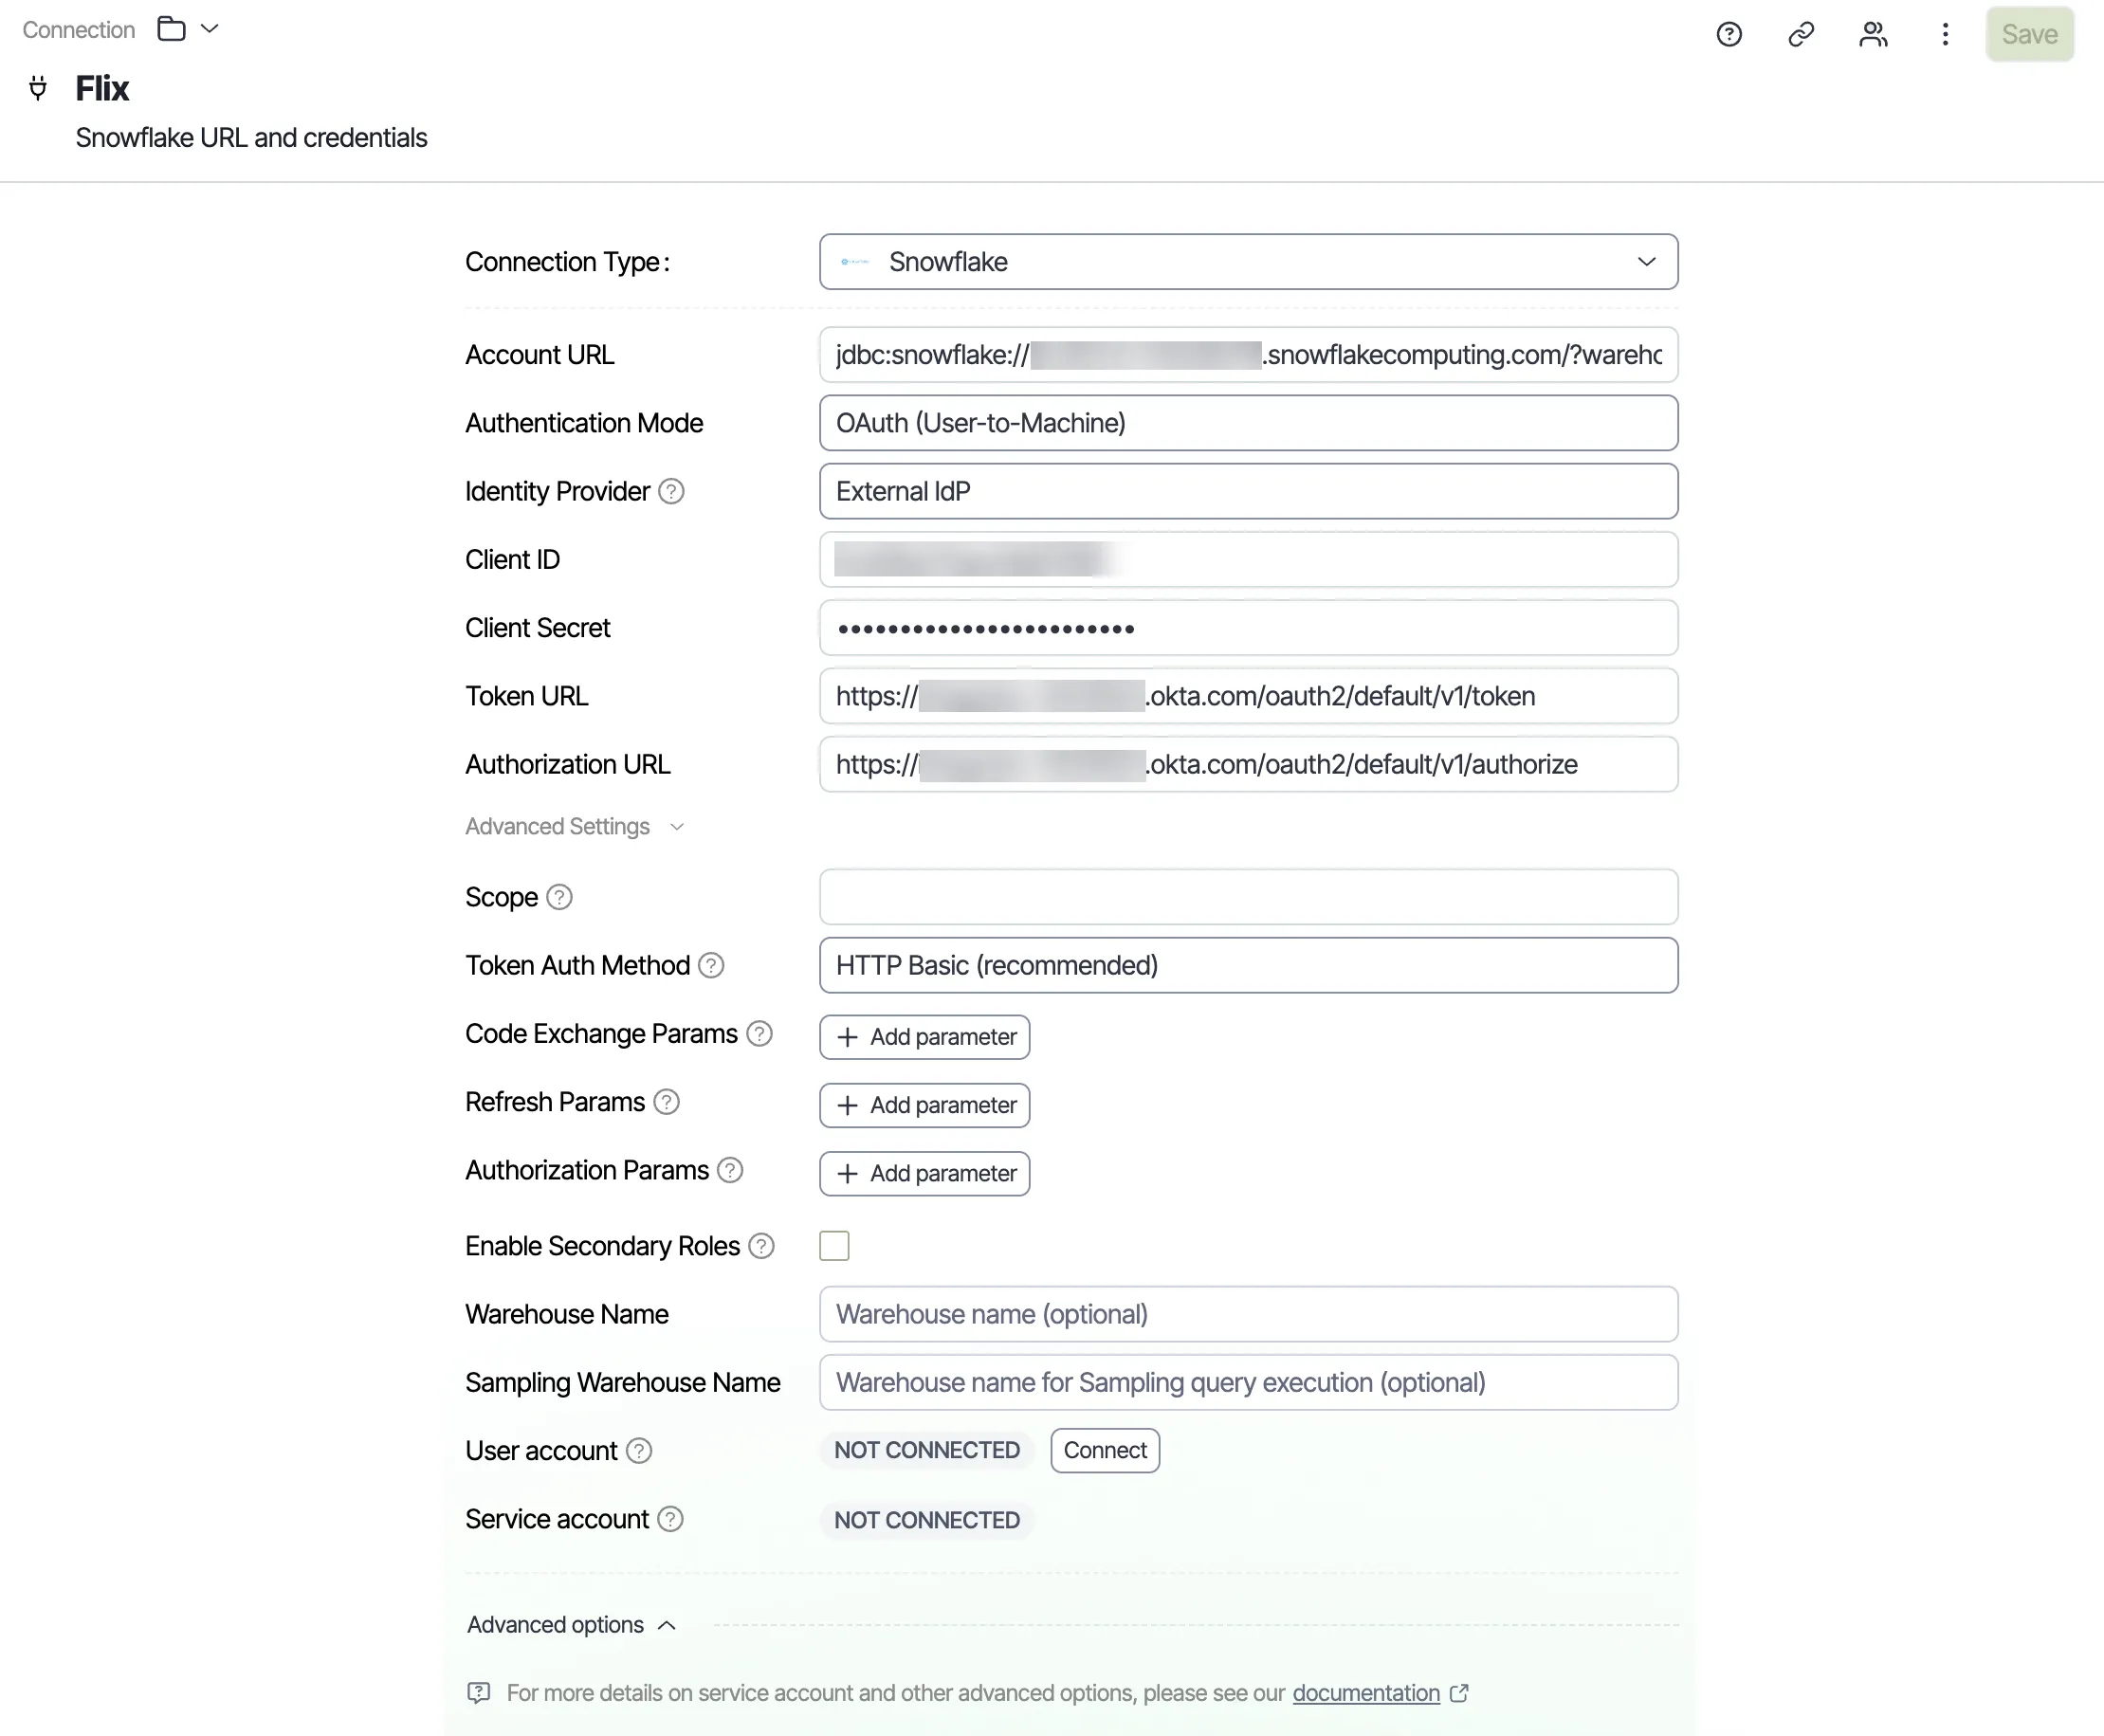
Adjust the advanced settings when your IdP expects nonstandard values in OAuth requests. The IdP then accepts each login and token request from Optimizely Analytics. Most Okta and Microsoft Entra ID setups work with the defaults. To show these fields, expand Advanced Settings on the Snowflake connection.
The Advanced Settings section contains the following fields:
- Scope – The OAuth scopes that Optimizely Analytics requests from the IdP, separated by spaces. When empty, Optimizely Analytics requests openid offline_access session:role-any. Set your own value only when your IdP requires different scopes. Keep session:role-any or a role scope, because Snowflake rejects tokens without a role scope.
- Token Auth Method – How Optimizely Analytics sends the client ID and client secret to Token URL. HTTP Basic (recommended) sends them in the authorization header. Request body sends them as form parameters, which some IdPs require.
- Code Exchange Params – Extra key-value parameters for the token request after a user logs in. Use them for IdP-specific values, such as resource or audience.
- Refresh Params – Extra key-value parameters for the token request that renews a login.
- Authorization Params – Extra key-value parameters for the login address that opens in the pop-up window. Common keys include prompt and login_hint.
To add a key-value parameter, click Add parameter, and then enter the key and value.
Access data through secondary roles
Turn on secondary roles when users need data that their secondary Snowflake roles grant. Each query then reaches every object that any of the user's roles grants.
By default, an External OAuth session uses only the role in the token. Snowflake does not activate secondary roles.
To turn on secondary roles, select Enable Secondary Roles on the Snowflake connection, and then click Save. After you save, Optimizely Analytics runs USE SECONDARY ROLES ALL at the start of each Snowflake session.
Secondary roles require EXTERNAL_OAUTH_ANY_ROLE_MODE = ENABLE on the security integration. Enable Secondary Roles applies only to the External IdP option. Users stay logged in when you change this setting.
Troubleshoot external IdP connection errors
Use the following entries to resolve the most common setup and login errors, so that each user connects to Snowflake:
- tokenUrl is required for OAuth (User to Machine) or authorizationUrl is required for OAuth (User to Machine) – The Snowflake connection has no Token URL or Authorization URL. Enter the token URL and authorization URL from your IdP administrator, and then click Save.
- tokenUrl must use HTTPS scheme or authorizationUrl must use HTTPS scheme – Optimizely Analytics accepts only HTTPS URLs for the IdP. Enter a URL that starts with https://, such as https://YOUR_OKTA_DOMAIN/oauth2/default/v1/token.
- tokenUrl points to a restricted host or authorizationUrl points to a restricted host – The URL resolves to a private or internal network address. Enter the public URL of your IdP endpoint.
- clientId is required for OAuth (User to Machine) or clientSecret is required for OAuth (User to Machine) – The Snowflake connection has no client ID or client secret. Enter the client ID and client secret, and then click Save.
- The IdP login rejects the redirect address – The IdP application does not list your callback address. Ask your IdP administrator to add https://ANALYTICS_DOMAIN/oauth/callback to the application.
- OAuth role not authorized (error code 391919) – The token does not grant the role that the query requires. Ask your Snowflake administrator to confirm the role scope, your default role, and EXTERNAL_OAUTH_ANY_ROLE_MODE.
- Data source disconnected – You have no active login on the Snowflake connection. You have not logged in, your login expired, or someone changed the IdP settings. Click Connect or Re-authenticate in the message. When logins expire repeatedly, ask your IdP administrator to confirm that the application issues refresh tokens.